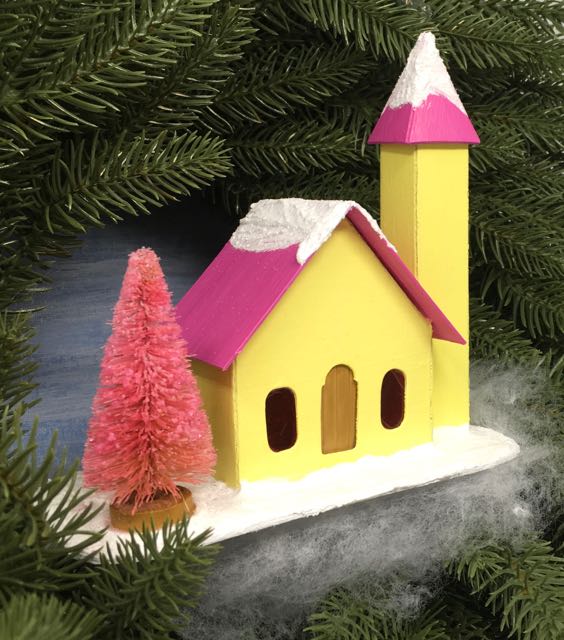
A little Putz church with a side steeple and a pink bottlebrush tree to add to your Christmas village.
The little yellow church with the side steeple is the latest in the 12 Houses for Christmas challenge. You'll find that it is an easy Putz house to make, but it adds a lot to your Christmas village. Because you must have a church in your village, right?
Somehow I did not take a single picture while I was making this house. How that happened I have no idea because I almost always document the process as I go along. I think I was trying to finish this Putz house and didn't pay attention to the steps. But the good news is that structurally this little cardboard house is exactly the same as the Little Log Cabin Christmas Putz House No. 2. The only difference in the patterns is that the steeple tower is wider and centered in placement next to the house. Oh, and it's got a steeple on top.
Here are the materials I used on the Little Church with Side Steeple:
- Pattern - Design No. 32 - in the November 2018 section of the Paper Glitter Glue library
- Cardboard - poster board cardboard works nicely
- Tracing paper
- Stylus for tracing your pattern onto your cardboard
- Gesso to prime the cardboard for painting
- Craft knife
- Paint:
- Squeezed Lemonade Distress Paint
- Picked Raspberry Distress Paint
- Gold paint for the door
- Alcohol Ink to stain the windows
- Leftover clear acetate packaging for the windows
- Village Dwelling Fixer Upper Die for the Door
- Painter’s tape
- Binder Clips
- PVA glues such as Aleene’s Fast Grab Glue or Tacky Glue
- Decorations and embellishments for Christmas:
- Ranger's Rock Candy Glitter - great glitter
- Bottlebrush trees
- Idea-ology Decorative Deer
- Snow-Tex or Grit Paste
Here are the links to all the other little houses in this series you can make:
- 12 Houses for Christmas Challenge
- Christmas Putz House No. 1
- Christmas Putz House No. 2 – Log Cabin Putz House
- Christmas Putz House No. 3 – Twin Gable Front Putz House
- Christmas Putz House No. 4
- Christmas Putz House No. 5 – Little Church with Side Steeple
- Christmas Putz House No. 6 – Frosty Barn
- Christmas Putz House No. 7 – Round Arch House
- Christmas Putz House No. 8 - Happy Holiday House
- Christmas Putz House No. 9 - Swiss Chalet
- Christmas Putz House No. 10 - Snowy Church
- Christmas Putz House No. 11 - Winter Cottage
- Christmas Putz House No. 12 - Split Level House
- Winter Village Wreath - where all the little houses reside now
How to Build the Little Church with Side Steeple:
Since I didn't take pictures as I made the house and this is such as easy house to make, I'm mostly going to describe some steps with the finished house.
These are the steps in making the Little Church:
-
First download the pattern from the library
If you are new to this site, the pattern - Design No. 32 - is located in my Paper Glitter Glue library which has a password. But it is easy to get the password by subscribing to my newsletter. That's all you have to do. And I will never send you any spam and you can unsubscribe at any time. Here's the form below to subscribe.
-
Now copy the pattern onto cardboard with whatever method you like
I use tracing paper to copy the pattern onto the cardboard, but you could just use a stylus (or a pen) and trace over the pattern to impress the design onto the cardboard. Some people cut out the pattern and trace around it. I used to do that, but it's not as accurate.
The photo below is from the Christmas Putz House No. 4 - the previous house.
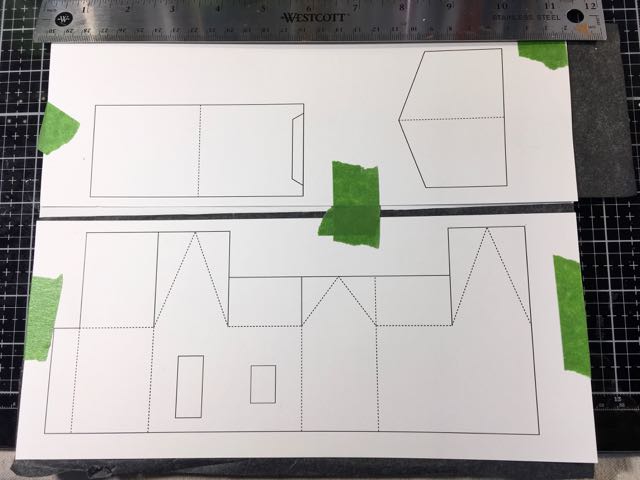
First step in making the little Christmas Putz house - transfer the pattern to the cardboard. This photo is from a different house though.
-
Score the fold lines and cut out
Now score the fold lines on your cardboard and then cut the little house out. Generally, I score before I cut out the piece because you have a full piece of cardboard to move around.
-
Cut out windows and door
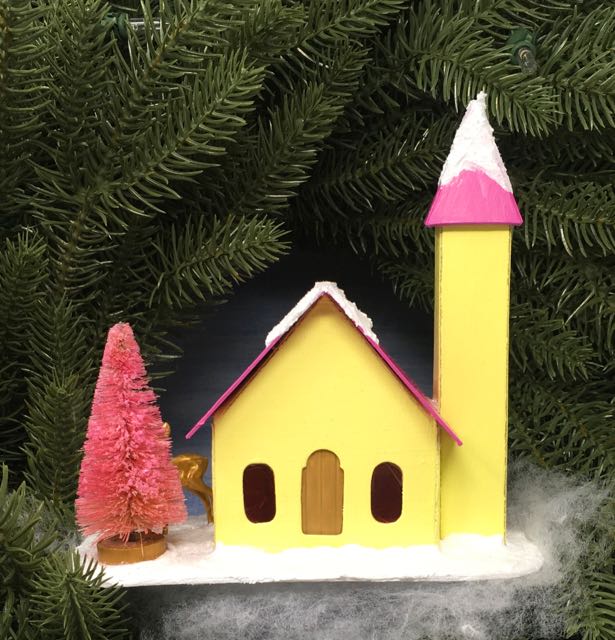
Front view showing the cut outs for the windows and the door. I added a gold painted door inside the house.
You can use the windows and the door I drew on the pattern or change them up however you want. Because I intend for these patterns to be simple, I didn't add windows on the sides. There is a hole in the back and underneath in the base for lighting though.
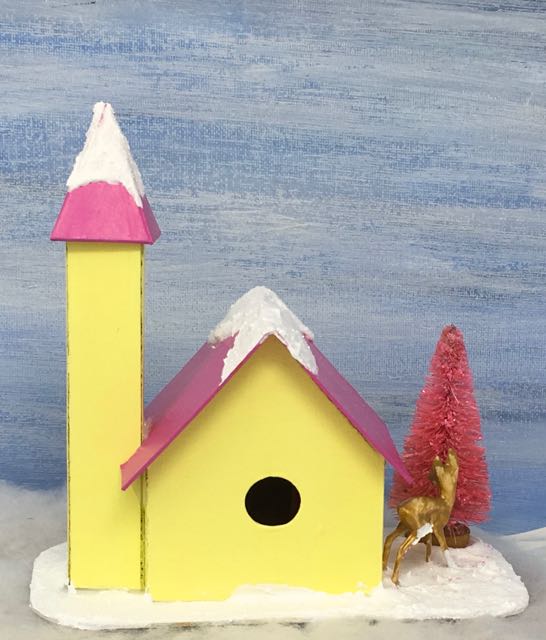
There is a hole in the back for lighting. The deer was playing in the snow.
-
Prime, paint the house and the cardboard base
At this step I prime and paint the house and the base. I just like to do it at this stage because I am such a messy painter. You can do it at a later step if you want.
Almost all of the houses in this series have white bases because I cover them up with snow.
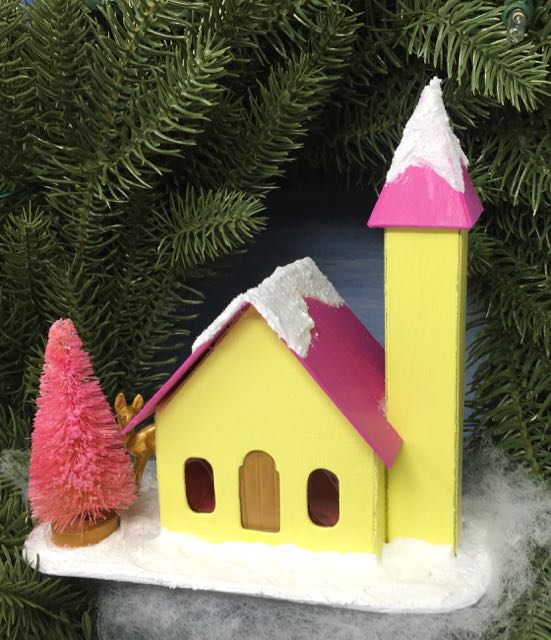
Little Putz Church with side steeple
-
Add the door and windows
Now glue the windows and the door on the back of the house. That's why I paint first so I don't have to worry about getting paint on my windows and the door. Also I find it so much easier to glue them in place when the house is flat.
-
Glue the house together along the glue tabs
And here is where the house starts to come together. You get so see how your little church will look at this step. But you also see a problem with painting before gluing. When you fold the corners of the house it often exposes some raw cardboard. We can't have naked cardboard on our house so you need to touch up the edges of the house with some paint. You can see on some of my houses my touch-up painting is a little lacking at times.
On the little church I painted the corners of the church nicely, but the steeple needs more touch-up.
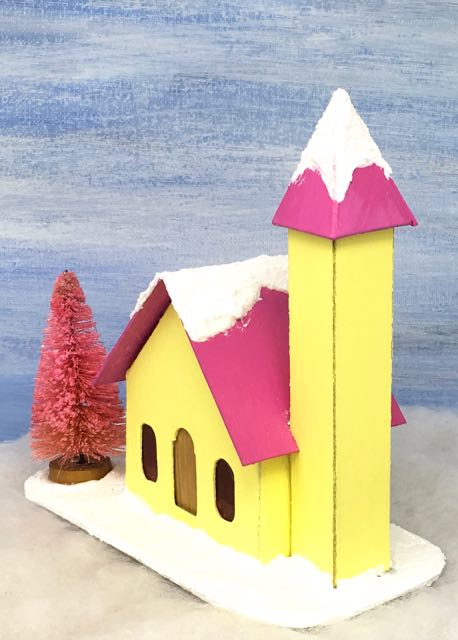
Side angled view of the Little Church with the Side Steeple and the pink bottlebrush tree
Also you have to trim the roof tabs just a little bit so they won't overlap. Here's a photo from the Log Cabin showing why that is necessary.
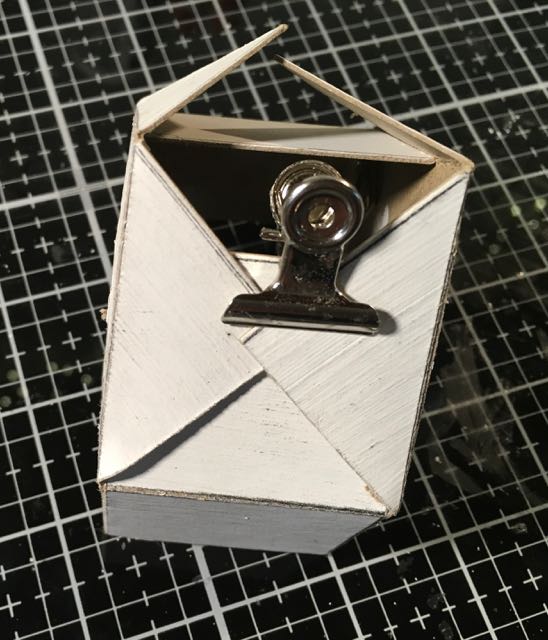
If the house is very narrow sometimes the roof tabs overlap the roof flap.
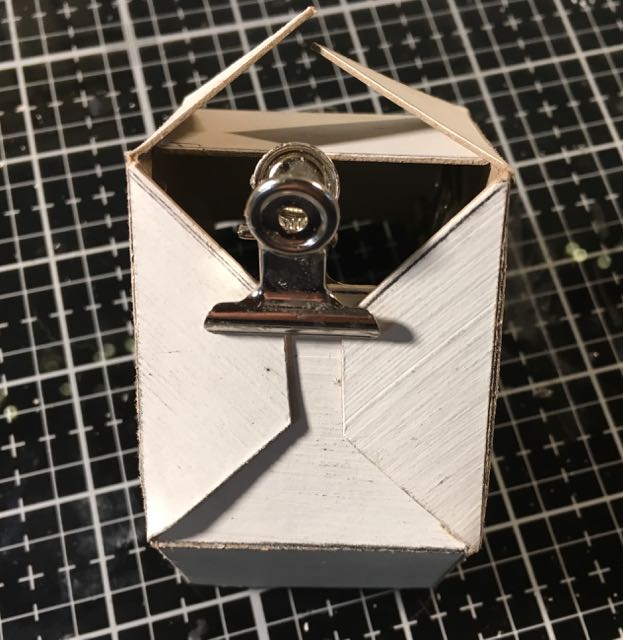
After trimming the roof tabs they now are flat against the roof
-
Add the roof to the house
First test fit the roof to make sure the overhangs are wide enough. Next test fit the steeple tower to make sure that it fits in the little notch on the roof. Sometimes you have to enlarge the space. Sometimes you have to cut a whole new piece. That happens to me fairly often. It's only cardboard.
After you know the roof piece is the right size, then glue it down. I found a new painter's tape that is incredible. It's for delicate surfaces and it adheres nicely without pulling up the paint. It's called FrogTape Delicate Surfaces. You can see it in use on the previous Putz house.
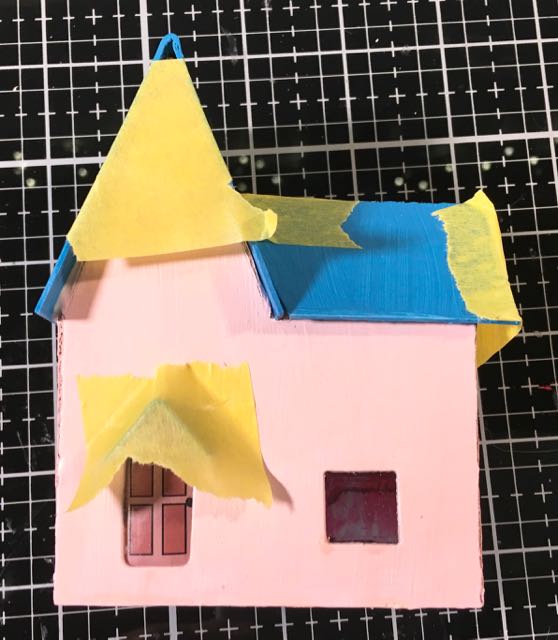
Painter's tape for delicate surfaces holds the roofs in place on a similar little house while the glue dries
Also glue the steeple to the steeple tower in this step. It is much easier to glue it on now. There is a trick though. When you glue it on and it looks straight from one side be sure to check it from the other side. Sometimes it looks good one way but it's tilted wrong on the other side. It can be hard to make it perfect so don't go crazy here. We're making handmade items that show the human touch so don't worry about a little imperfection.
-
Glue to the base
Once the glue dries on the roof, you can glue the little church to the base. Also glue the steeple tower on a the same time. Add glue to the side of the tower where it abuts the main church structure. Add a thick bead of glue to the bottom of the tower as well.
-
Decorate your little house
The paint colors for this little church are Squeeze Lemonade Distress paint and Picked Raspberry Distress paint for the roof. The yellow is a pretty delicate yellow and I think the roof color goes well with the church. Because two other houses were painted white, I needed a different color for the church. Perhaps a delicate blue would be nice for the church?
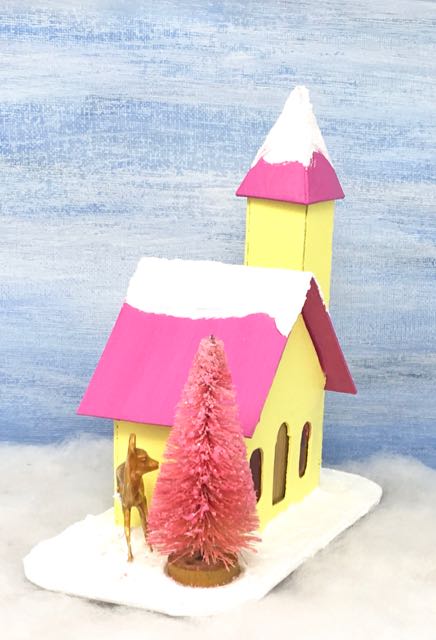
Side view of the Little Church with side steeple showing the deer peeking around the corner
I have a number of stained bottle brush trees left over after the Little House Making Party which I used here. Here I added Rock Candy glitter to the tree. Because I just love the little deer, I painted it gold and have it peeking around the corner. The roof peaks and the base is covered with Snow-Tex and then glittered.
It's a simple church. Really pretty easy to make. Let me know if you try it.
At the end of every post I include a pin that you pin to your favorite Pinterest board. That way you can remember where you found the Little Church with the Side Steeple. Feel free to pin any other photos.
Thank you for reading. Tomorrow's house is shaped like a barn inspired by this vintage set of 1930's Putz Houses.
Lucy


Leave a Reply