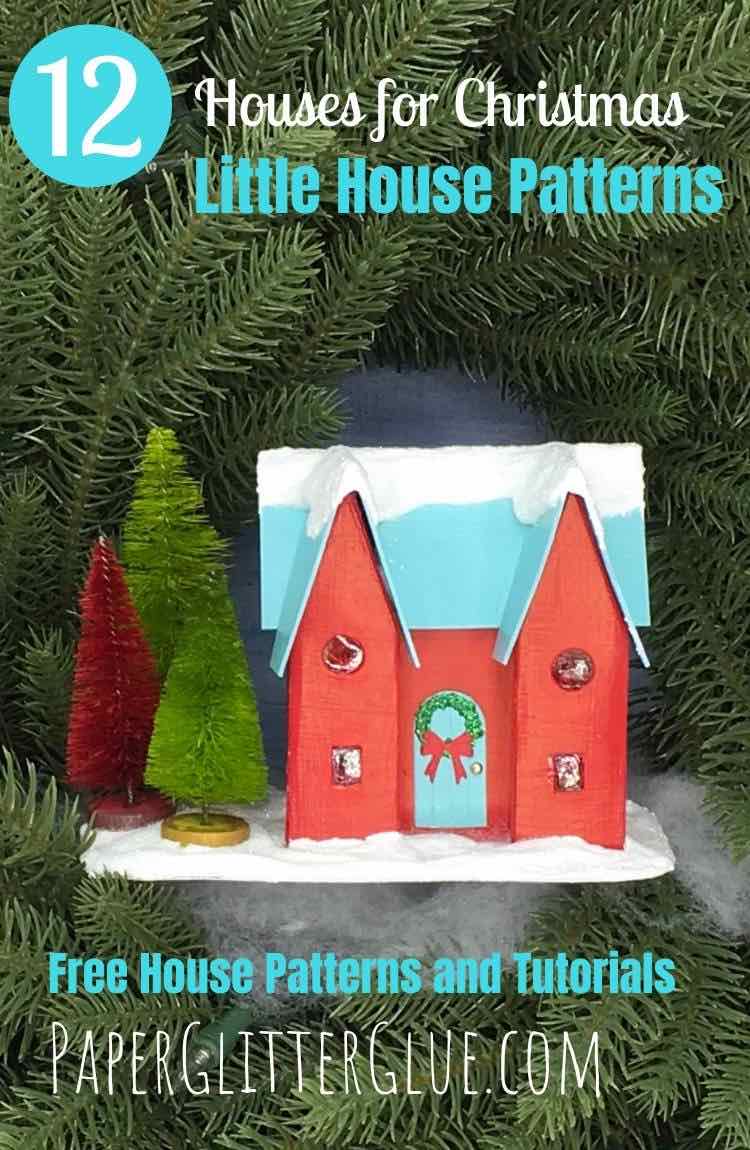
The Happy Holiday House is the 8th house in the 12 Houses for Christmas series of free patterns and tutorials to make a Christmas village.
Learn how to make this Happy Holiday House - a little cardboard house - for your Christmas village with the easy and free pattern I've made for you. Today I'll show you how with the Putz house pattern and instructions below.
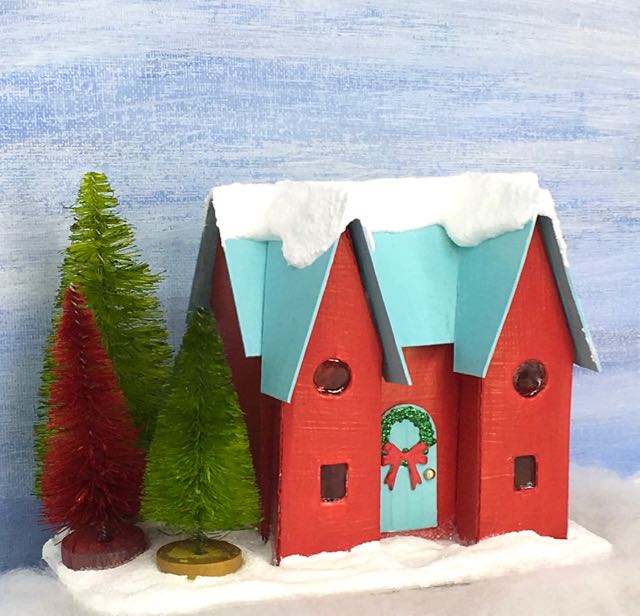
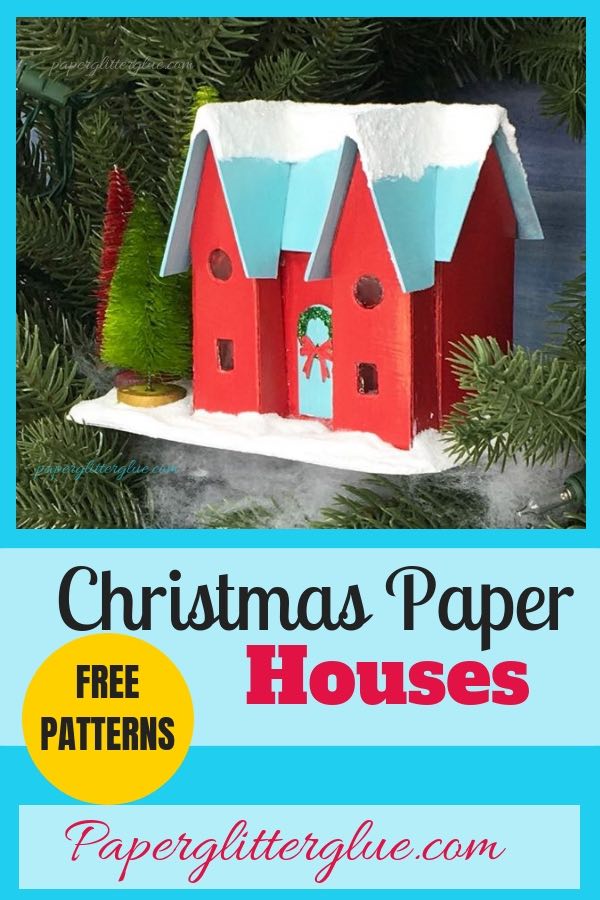
Front view of the Happy Holiday House - Christmas Putz House No. 8
Download the Pattern from the Paper Glitter Glue Library
This pattern is in the November - December 2018 section of the library as Design No. 35. It has been updated with both SVG and PDF patterns.
If you are new to this site, the pattern is located in my Paper Glitter Glue library which has a password. But it is easy to get the password by subscribing to my newsletter. That’s all you have to do. And I will never send you any spam and you can unsubscribe at any time. Here’s the form below to subscribe.
What do you need to make this little house?
Materials:
- Pattern from the Paper Glitter Glue library - Design No. 35
- Cardboard
- Tracing paper
- Stylus for tracing
- Gesso
- Craft knife
- Paint
- Painter's tape
- Binder Clips
- Aleene's Fast Grab Glue or other PVA glue
- Decorations or Christmas embellishments for your little house
And you do you make this little Christmas Putz House?
Here are the general instructions:
- Download and print the house pattern from the Paper Glitter Glue library - Design No. 35
- Copy the pattern onto cardboard
- Score the fold lines and cut out the house
- Cut out windows and door on the house
- Prime, paint the house and base
- Add the windows inside the house then add the door
- Glue the house together along the glue tabs
- Add the roof to the main part of your miniature house
- Now glue the 2 roof pieces onto the front extensions to your house
- Glue the house to the cardboard base
- Finally the fun begins - you get to decorate your little house
ADDITIONAL LINKS:
Here are the links to all the other little houses in this series you can make:
- 12 Houses for Christmas Challenge
- Christmas Putz House No. 1
- Christmas Putz House No. 2 – Log Cabin Putz House
- Christmas Putz House No. 3 – Twin Gable Front Putz House
- Christmas Putz House No. 4
- Christmas Putz House No. 5 – Little Church with Side Steeple
- Christmas Putz House No. 6 – Frosty Barn
- Christmas Putz House No. 7 – Round Arch House
- Christmas Putz House No. 8 - Happy Holiday House
- Christmas Putz House No. 9 - Swiss Chalet
- Christmas Putz House No. 10 - Snowy Church
- Christmas Putz House No. 11 - Winter Cottage
- Christmas Putz House No. 12 - Split Level House
- Winter Village Wreath - where all the little houses reside now
Here are the steps involved
First download the pattern and print it out
Copy the pattern onto cardboard
Then layer the pattern over tracing paper facing downward onto cardboard. I tape them all together and trace the pattern onto the cardboard.
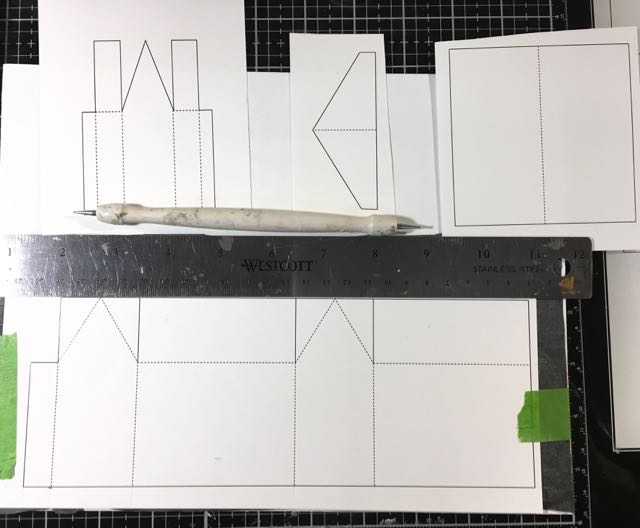
Putz house patterns taped to cardboard and tracing paper
Score the fold lines and cut out the house
Now here are the pieces cut out. I wasn't sure about how the front extension pieces would fit on the house so I didn't add the cutouts on the roof until I could test fit them below. Your final pattern has the cutouts in the correct place.

Cardboard pieces cut out for the Happy Holiday House Christmas glitter house
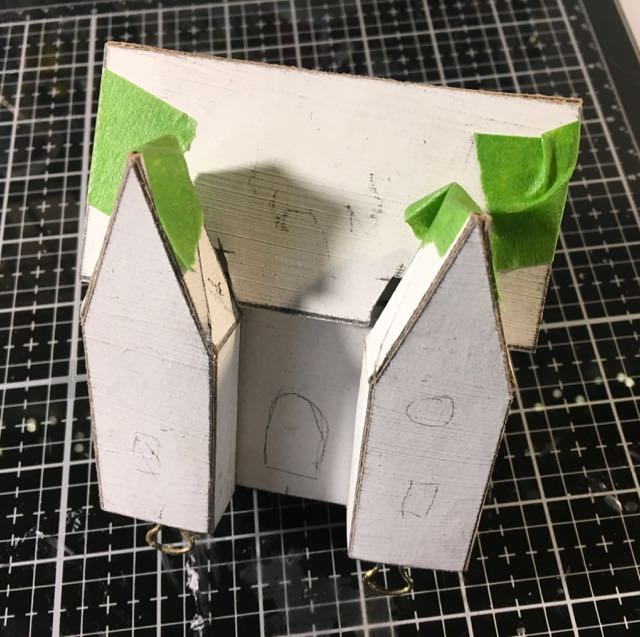
Here's where I test fit the extensions to the house to plan the cut outs on the roof piece. The house is not glued together at this point. Binder clips let me to the test fit before gluing.
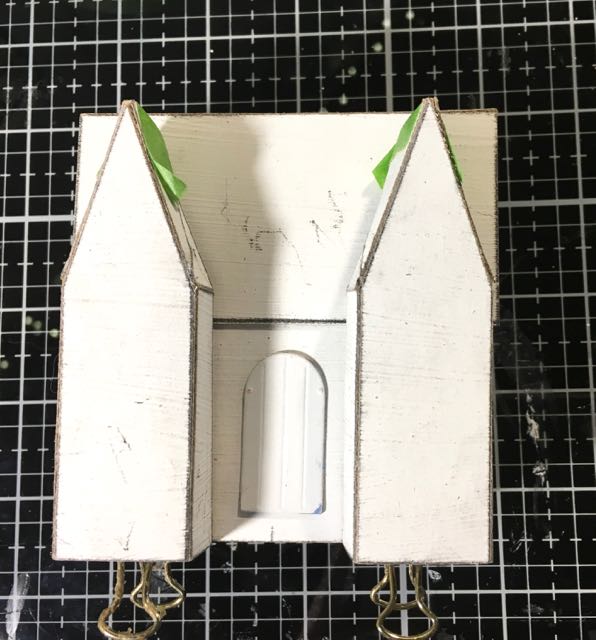
Testing the front gable extensions to the little cardboard Christmas Putz house
Now with the cut outs on the roof I can see that the house will go together properly.
Test fit the roof piece around the front extensions to your little house. It works.
Cut out windows and door on the house
After the testing that all the parts fit, I cut out the windows on the front pieces and the house itself. For this house I didn't cut out the door.
Prime, paint the house and base
This is the stage where I usually prime and paint the house. You can wait until the house is all assembled, but then I get paint in the wrong spots. So I usually paint the roof and the house before they are glued together. You might be a much better painter than I am.
Add the windows inside the house before you glue the house together
More binder clips to the rescue in the photo below. Often I use this type of binder clip to hold pieces together in tight spaces. They work really well gluing down the roof tabs onto the roof flaps.
Also you can see where I glued some red acetate windows (scrounged from clear packaging stained with red alcohol ink) to the back of the windows. It gives a nice red glow when I light is inside. If you are adding a door to a cut out section, I would add it now. If not you can add it during the decoration phase.
Another important feature in this photo is the window cut out on the house itself. If you want light to be able to shine through the windows on the front you have to cut out a window on the house. You can make it bigger than this but I figured this was enough for these little windows. Because these houses are so small I'm not really worrying about lighting.
Glue the house together along the glue tabs
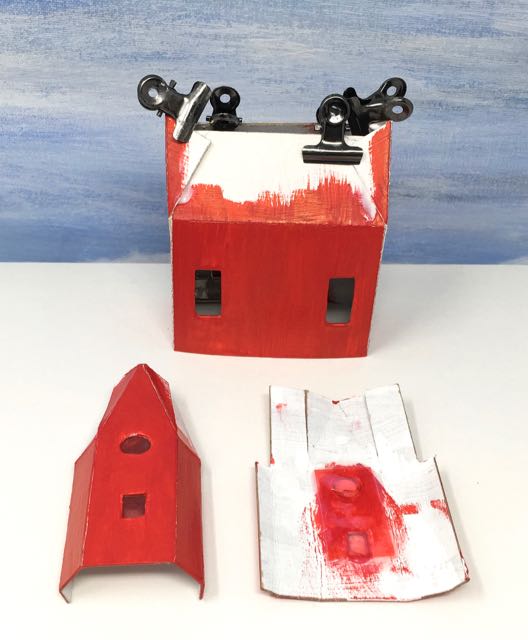
The house is held with binder clips under the glue is dry. Back of the front extension showing the window acetate stained with red alcohol ink.
Glue your house together with PVA glue. Use binder clips and/or painter's tape to help hold it in place while it dries. Then glue the front extensions to your house. Locate them to each side of the house.
Now Glue the Roof to the House, then glue on the roof pieces to the front extensions
After you glue the front extensions onto the house, glue the roof on fitting it around the angled gables. Then glue the roof pieces to the front extensions. I made the angled roof pattern for the front extensions a little long so you can trim them to the length you want.
Glue the house to the cardboard base
The cardboard base is just two pieces of cardboard glued together and cut a little larger than the house itself. For most of the bases for this series of little houses, they are painted white. To make sure the house adheres well to the base, I run a little line of glue around the inside of the house and hold firmly to the base. Just hold it for a few minutes, then set it down and gravity will do the rest.
FUN TIME! Decorate your little house however you want
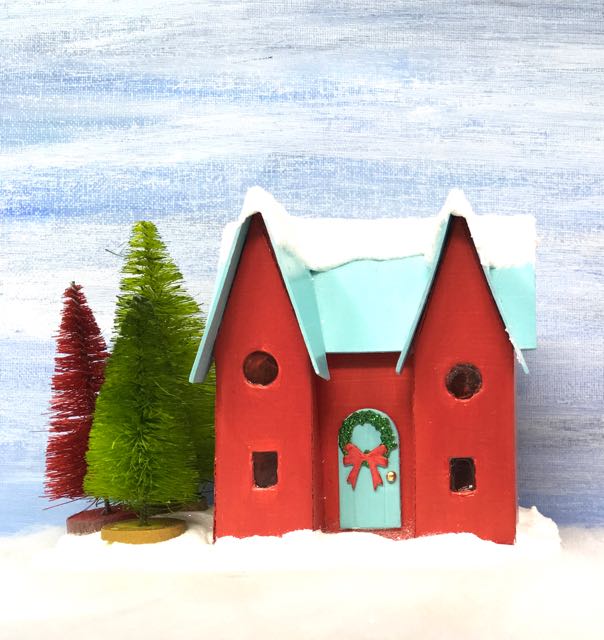
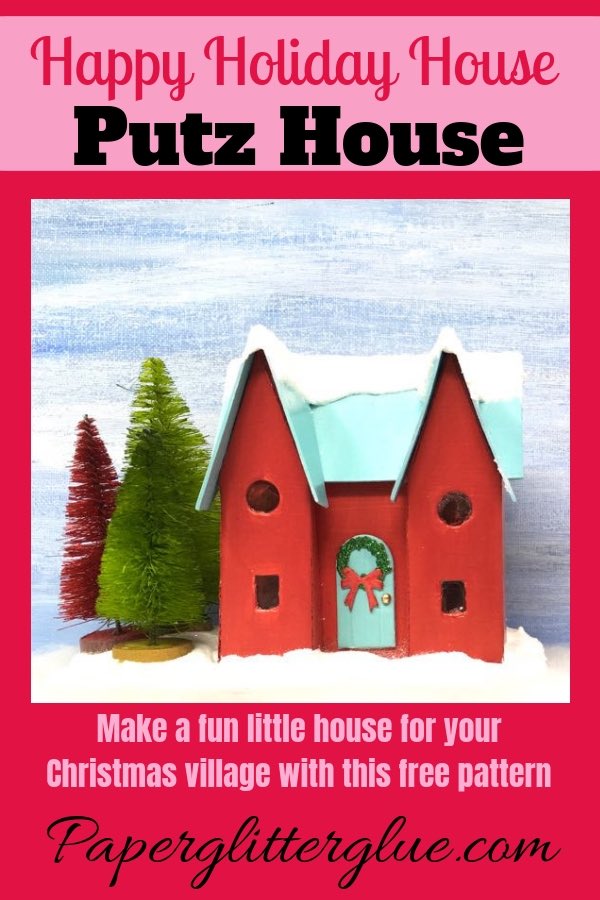
Once the house is complete it's time for decorating. The red is a little overwhelming so I added a light colored door and a wreath on the door. I also added a forest to the left of the house and lots of glittered snow on ground. For some reason I can't seem to get the glitter to show up in the photos, but it looks really good in person.
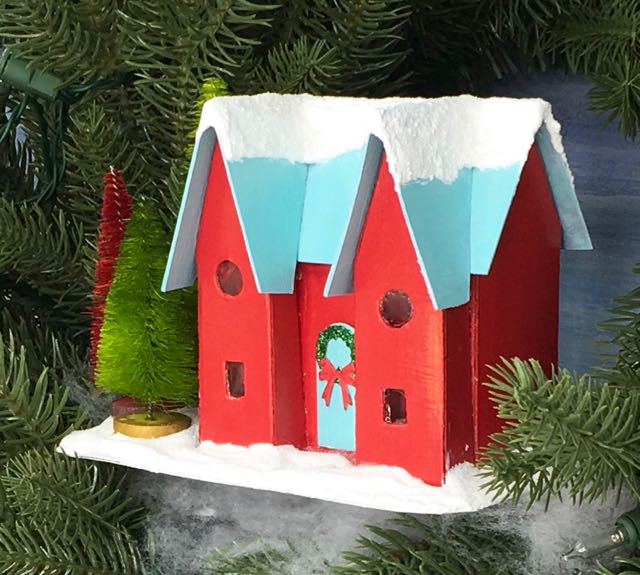
Fun little Putz house called the Happy Holiday House
The next house on the drawing board is a Swiss Chalet. I think you will enjoy making this house, too.
Thank you for reading. And if you have questions, just let me know at [email protected]. I am always glad to help.
Lucy
P.S. Pin any of the photos to your favorite Pinterest board to remember where you found these instructions.

Sharon
Thanks for your reply. I will give it a try and let you know.
Sharon
the pattern does not match the instructions. the pattern does not have room on the front of the house for extensions. the pattern has windows. Please help.
thanks
Lucy
The front extensions are 1 inch across and the house itself is 3 inches across so there should be room for the front extensions. I didn't remake the house, but I think it works.
Lucy
Sharon
the pattern does not match the instructions. the pattern does not have room on the front of the house. the pattern has windows. Please help.
thanks
Lucy
Sharon,
I re-did the file, but I think it is correct. That large "windows" on the main part of the house are really just to let light into the two front extensions. The front extensions have small windows on them.
When I re-did the pattern, I added 2 small windows on the side.
And I added SVG cut files for people who use cutting machines.
Email me - [email protected] if you have more questions. I hope this helps you.
Lucy
Libby Lovings
Thank you so much for these patterns! I know it will be a lot of fun making these sweet house's! This will be my new
hobby! Thanks again
Libby Lovings