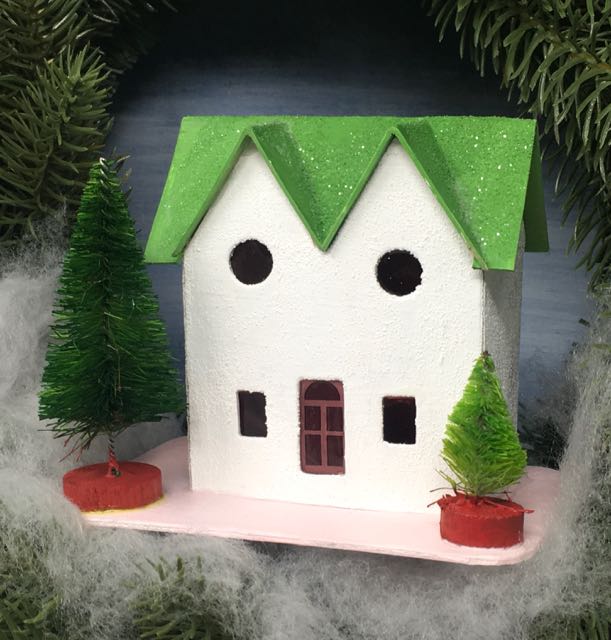
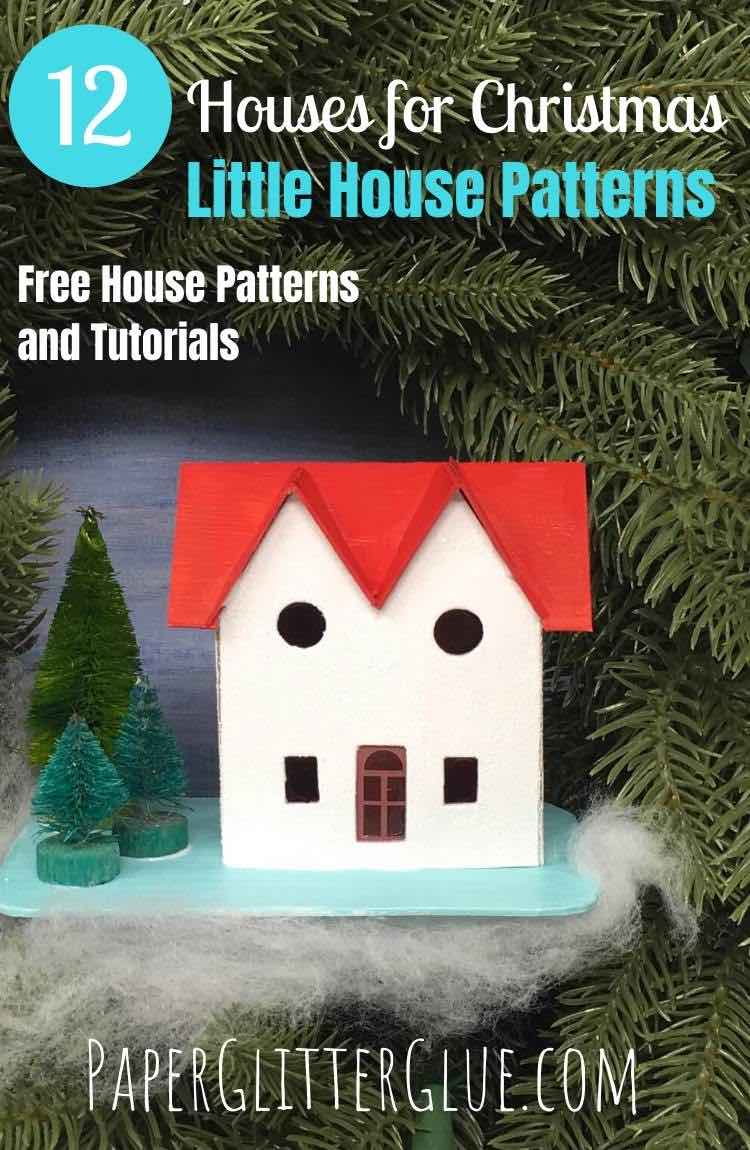
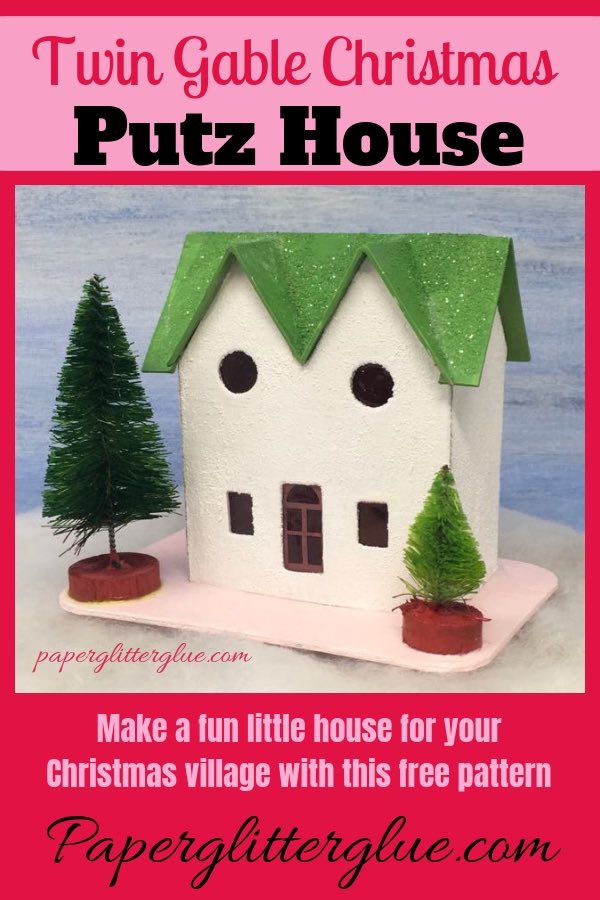
The Twin Gable Christmas Putz house simply decorated with two green bottle brush trees.
The 12 Houses of Christmas continues with the Twin Gable Christmas Putz House. This little Putz house has two symmetrical gables in the front which makes a cheerful miniature house.
Add the Twin Gable Christmas house to your Christmas village with the free pattern from the Paper Glitter Glue library.
Little Christmas Putz house with twin gables in the front for your Christmas decor
Let’s get started on the Twin Gable Christmas house.
HOW TO MAKE THE Twin Gable Christmas house?
DOWNLOAD THE FREE Pattern Twin Gable Christmas house from THE PAPER GLITTER GLUE LIBRARY
You can find all my free patterns in my Paper Glitter Glue Library. I always list the patterns chronologically. That means you will find the newest 12 Houses for Christmas paper house pattern first at the top of the library. Generally I list these houses by their number. Today’s house is Christmas Putz House No. 3.
I do not have an SVG pattern for this little house at this time.
To get access to the library, simply subscribe to my newsletter with the form below and you will be sent the password immediately so you can download the pattern. Then click on the library link, click to enter the password protected area, type in the password and then the list of free patterns and tutorials will be available.
Please remember that these patterns are exclusively for your personal use.
This post contains some affiliate links for your convenience. Click here to read my full disclosure policy.
MATERIALS
- Twin Gable Christmas House - Christmas Putz House No. 3 - Design No. 30
- Tracing paper (if you are copying the pattern to cardboard)
- Cardboard
- Cutting Mat
- Metal-edged ruler
- Craft knife and scissors
- Aleene’s Fast Grab Glue or similar glue
- Gesso
- Paint colors of your choice
- Paintbrushes
- Alcohol ink to color the windows
- Rock Candy Glitter
- Snow-Tex or Grit Paste
- Christmas embellishments
BRIEF OUTLINE OF DIRECTIONS
- First download the free pattern - Design No. 30 - and print from the Paper Glitter Glue library
- Copy the pattern for the Christmas Putz House No. 3 onto cardboard, score the fold lines, cut out
- Cut out windows and the door
- Prime and paint the house and and base
- Add the door and windows to the inside of the house
- Glue house together along the glue tabs and roof tabs
- Glue roof to house
- Cut out cardboard base, prime and paint
- Glue house to base and add embellishments
Here are the links to all the other little houses in this series you can make:
- 12 Houses for Christmas Challenge
- Christmas Putz House No. 1
- Christmas Putz House No. 2 – Log Cabin Putz House
- Christmas Putz House No. 3 – Twin Gable Front Putz House
- Christmas Putz House No. 4
- Christmas Putz House No. 5 – Little Church with Side Steeple
- Christmas Putz House No. 6 – Frosty Barn
- Christmas Putz House No. 7 – Round Arch House
- Christmas Putz House No. 8 - Happy Holiday House
- Christmas Putz House No. 9 - Swiss Chalet
- Christmas Putz House No. 10 - Snowy Church
- Christmas Putz House No. 11 - Winter Cottage
- Christmas Putz House No. 12 - Split Level House
- Winter Village Wreath - where all the little houses are now
Here we go.
-
FIRST DOWNLOAD AND PRINT THE PATTERN FOR YOUR LITTLE HOUSE
First download and print the PDF pattern for the Twin Gable Christmas Putz House from the Paper Glitter Glue Library.
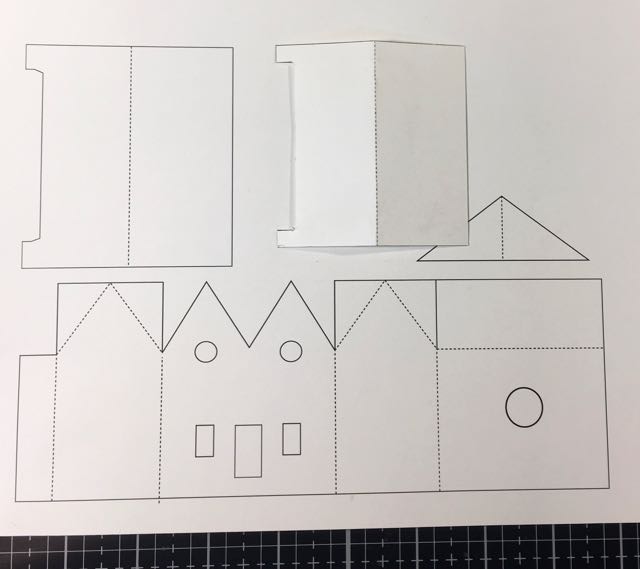
Here's an overview of the pattern. My first house had a roof that was a little too narrow with gaps at each end so I modified the pattern.
-
COPY THE Twin Gable Christmas Putz PATTERN TO CARDBOARD
Use your favorite method copy the pattern to your cardboard.
-
SCORE YOUR PATTERN, THEN CUT IT OUT. ALSO CUT OUT A SMALL CARDBOARD BASE
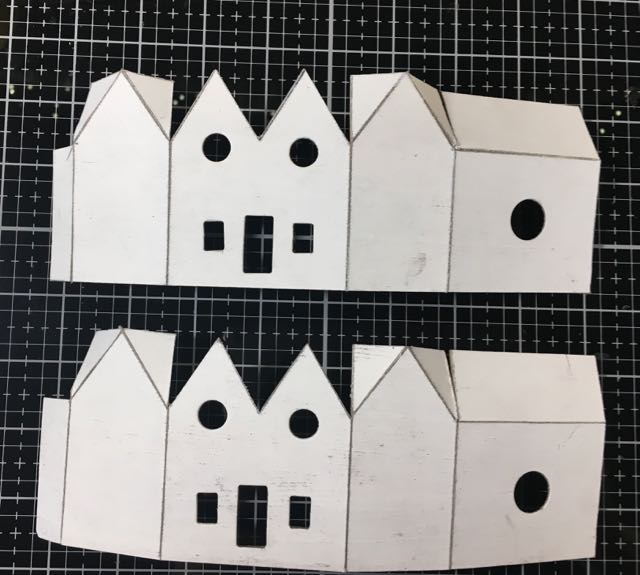
Two little Twin Gable Putz houses ready for paint
The pattern itself is pretty simple with just twin front gables on the house. You may shrink or enlarge your pattern to whatever size you want depending on your sources of paper and size of cardboard.
Once you have the pattern copied to your cardboard, the score along the fold lines before you cut it out. Often, it is a little easier score before you cut the house out of the cardboard.
For the bases on these little houses, cut out a small piece cardboard a little bit larger than the house. This cardboard doesn’t need to be anything fancy.
-
Cut out WINDOWS AND DOORS
I cut out a few small windows and one door in a similar pattern to the vintage house.
-
Prime and Paint Your Putz House
Next I prime my little houses with gesso (gesso is a white paint primer which prepares your cardboard to hold onto paint better).
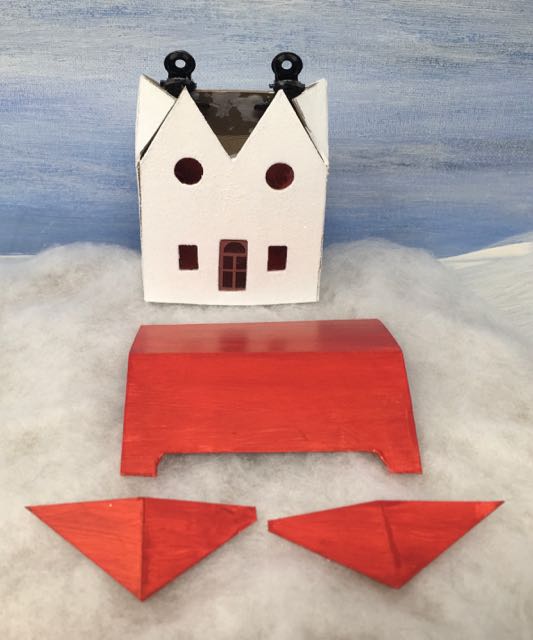
Because the vintage house this pattern is based on looked white the photo, I decided to paint both sample houses white. But they needed something for visual interest so I coated one with Ranger Grit Paste and one with a light sprinkling of Rock Candy glitter. Now they both have some texture and are more interesting.
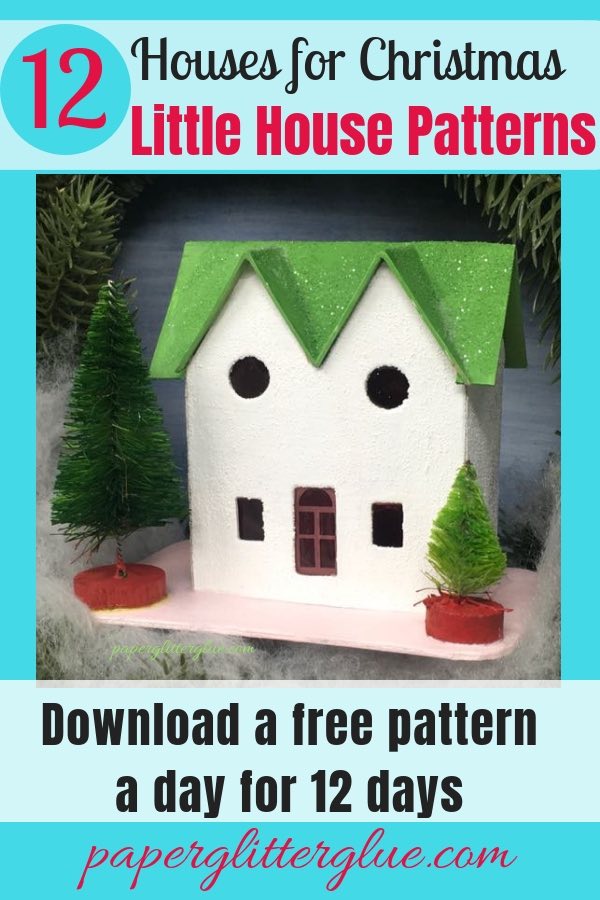
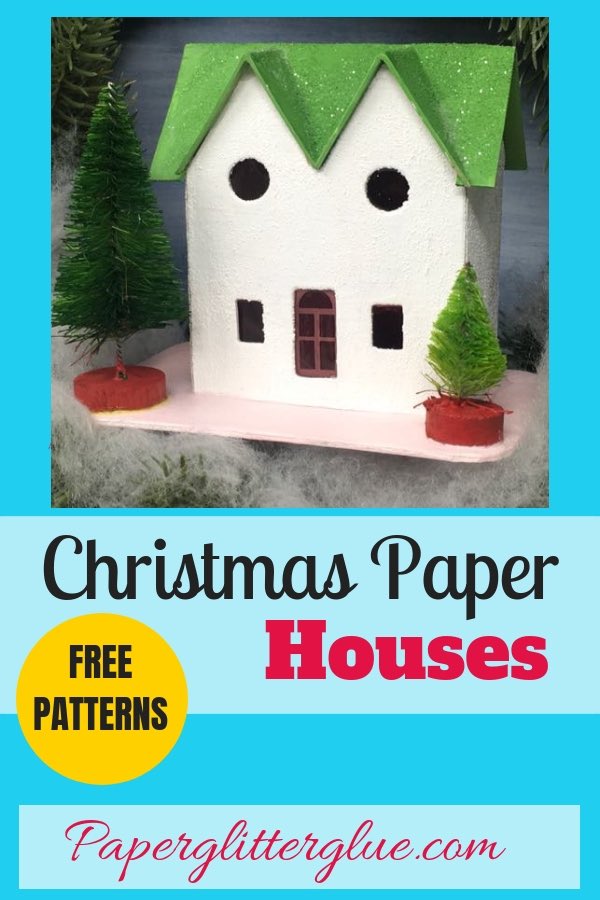
One roof is painted with a wonderful Christmasy red Distress Paint called Candied Apple. When you paint the roof be sure to paint about ¼ inch around the underside because it will show when the roof is glued on. The other roof is painted with a nice green Distress paint shade called Mowed Lawn.
-
Add the Windows and the Door
Glue the windows and the door to the inside of the house. I use a piece of leftover acetate packaging stained with red alcohol ink to make my windows. And I drew a little door on my computer and glued it in place.
-
NEXT FOLD ALONG THE SCORED LINES AND GLUE YOUR LITTLE Christmas HOUSE TOGETHER
Now fold the house along the scored lines and glue the house together with the glue tab in the back. Let dry before you try to glue the roof on.
The red roof twin gable house glued together. Notice how middle end of the gable is slightly trimmed.
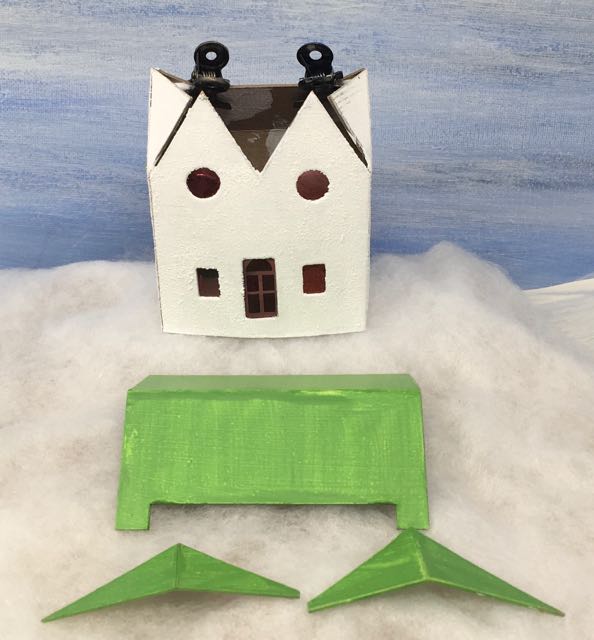
The Green roof Twin Gable Christmas Putz house glued together
If you use painter’s tape on the painted section of your house to hold your house together while the glue dries, be sure to peel it up carefully because it sometimes will peel up the paint. I used a little bit of tape on the house with Grit paste, but I didn't use any on the already glittered house because I didn't want to pull up the glitter.
Oh, you can paint your houses after this stage. I am just such a messy painter than I usually paint early in the process so I can fix it easier.
-
GLUE THE MAIN ROOF TO THE HOUSE, THEN GLUE THE GABLE ROOF TO THE HOUSE
Fit the main roof around the twin front gables.
Sometimes the space you cut out of the edge of the roof is too small so you have to enlarge it a little bit. And then sometimes there is a bit of a gap around the gable roof which you can hide with a piece of paper or tissue paper or glue or snow. Remember that snow covers construction goof-ups on Christmas houses.
But I must admit every once in a while I have to cut another roof because the gap is just too big. See the examples below. I made two houses to tweak the pattern to help prevent gaps on the roof, but it can still happen.
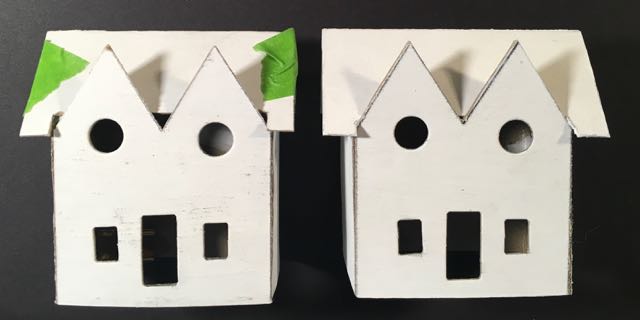
Two versions of the Twin Gable house showing the gaps around the gables in the middle
After the main roof is glued on, you add the front twin gable roofs. Because of variation in thickness of paper and cardboard, I didn't trim the intersecting edge of the gable roofs on the pattern. The pointy tip where they intersect needs to be trimmed so that they meet in the middle. You can see it on both the red and green roof photos show above.
Just score the gable roof in the middle, fold and apply glue to the angled seam to the roof so it will adhere to the main roof. Also add a bead of glue to the front of gable so those edges will be glued as well. Hold the gable roof in place or tape with painter's tape. I usually use painter's tape.
-
PAINT CARDBOARD BASE and then adhere the house with glue
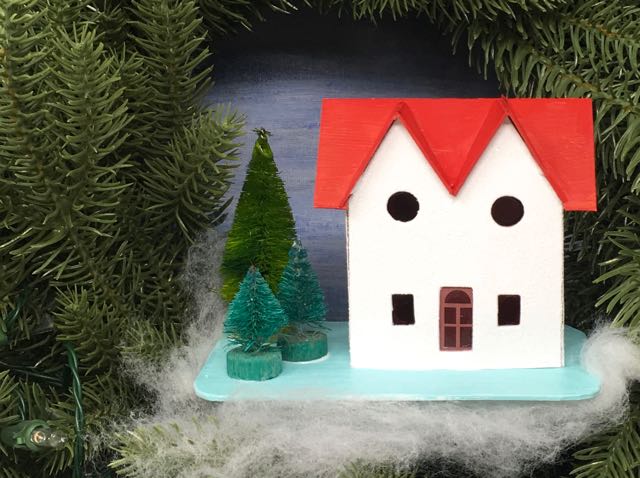
Now that you have glued both the main roof and the twin front gable roofs on, your Christmas Putz house no. 3 is basically done. Most of the 12 Houses of Christmas will have a white base, but because these two houses are white, I painted one base pink - Spun Sugar distress paint and one base a light blue - Tumbled Glass.
Apply a thick bead of glue onto the bottom of your house and glue it to your painted cardboard base.
-
DECORATE YOUR LITTLE HOUSE
I like this design so much that I didn't really decorate the houses very extensively - just glued on some bottle brush trees. One tree I messed up a little bit. I added blobs of snow and the stain bled through the white blobs of snow. I did replace the tree.
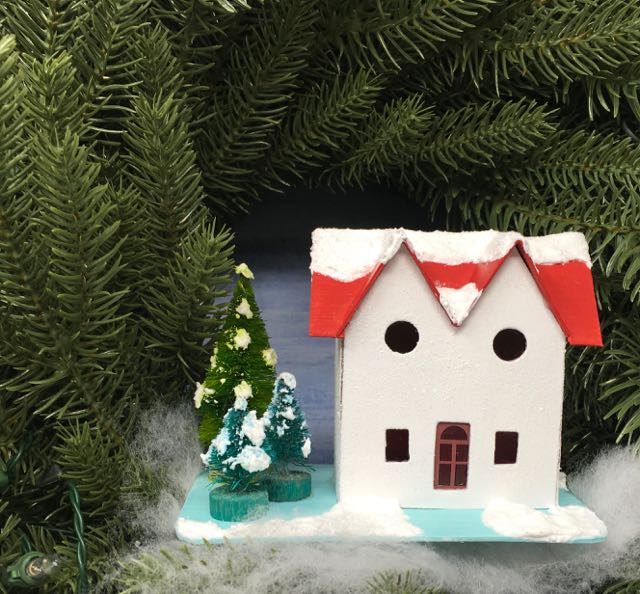
Twin Gable Christmas Putz House No. 3 in a wreath
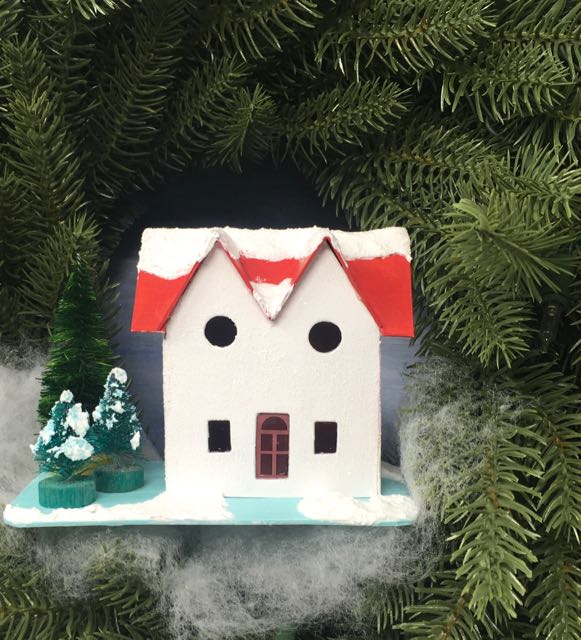
Finished Red Roof Twin Gable Christmas Putz house in a Christmas wreath
Now we have completed Twin Gable Christmas House No. 3 in the 12 Houses for Christmas challenge. What's next? Another interesting variation from the vintage set of 8 on the Papa Ted's website. I hope you will stop by tomorrow.
Lucy
P.S. Please feel free to email me at [email protected] or leave a comment if you have question or a suggestion.
Be sure to these to your favorite crafty Pinterest board so you can remember where you found the little houses.
How to make a cute little Christmas Putz house with twin gables in the front with these free patterns. Great little house to add to your Christmas village
Pat Hirsch
If you have dimensions for Twin Cable Front house, can you please provide?
Thank you,
Pat Hirsch
Lora
I had heard of putz houses, but never been able to find CLEAR patterns/instructions for making one (or in my intent - MANY.). Had finally settled on actually BUYING a set of pre-cut, but then learned they wouldn't come in until - probably - the first of the year!😣 So IMAGINE my DELIGHT when I ran across your blog!!!!! I am SO EXCITED to get started!!! You see, I had to give up my fledgling ceramic village (due to weight & breakage issues) when hubby and I downsized to full-time RV lifestyle. So these little putz houses are EXACTLY what I've been looking for!!!! THANK YOU!!!
Lucy
Lora, I am so happy you found my blog. You said you wanted to find clear patterns and instructions for making a Putz house - that is exactly what I am trying to do. I really do appreciate your comment. It means a lot to me. Thank you so much. Lucy
Norma
Loving these houses, thanks for sharing, I need to make these.
Lucy
Thank you. I hope you will try it. These are pretty easy little houses. This one is about 2.5 inches across. I am making this series of houses very small so you tuck them in anywhere - like a little delightful vignette or surprise on a shelf. Let me know if you make one. I would love to see a photo.