The last house in the series is here - the Split Level Christmas Putz house.
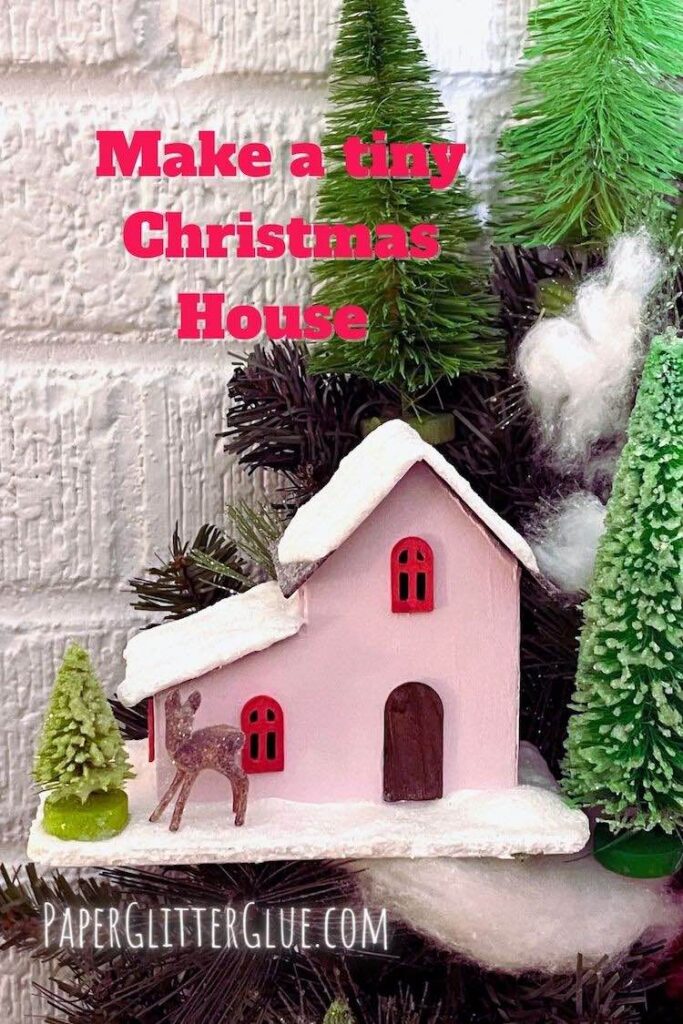
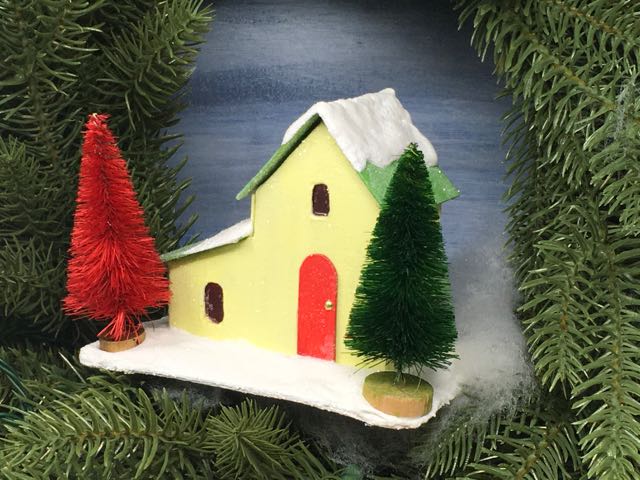
Table of Contents
Designing the Split Level Christmas Putz House Pattern
Here's another house your can make for your Christmas village - the Split Level Christmas House. You can find the printable template in the Paper Glitter Glue library. It' Design No. 39 in the library. Check out the materials list and instructions to make your own Split Level Christmas house below.
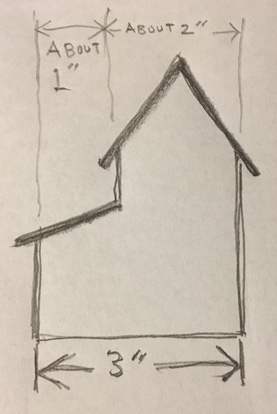
There's a bit of a story to choosing this house for the last in the series. One of my buddies on the Cardboard Christmas forum sent me an email asking me if I had made a house with the shape in the photo below.
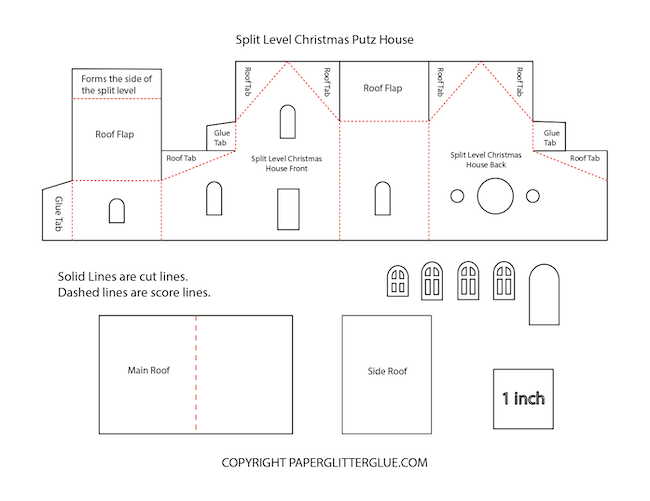
Looks easy enough, right? Well, the pattern-making is actually quite a challenge. Why? Because you have to figure out how to cover that little side of the split level. I couldn't even cut it out right. I kept cutting off tabs and scoring where I needed to cut. That initial pattern worked, but it was a serious pain. That's why the second version - the version in the library is MUCH simpler.
So the pattern below is NOT the correct pattern. It just demonstrates how complicated patterns can be. You will like the one in the library MUCH better.
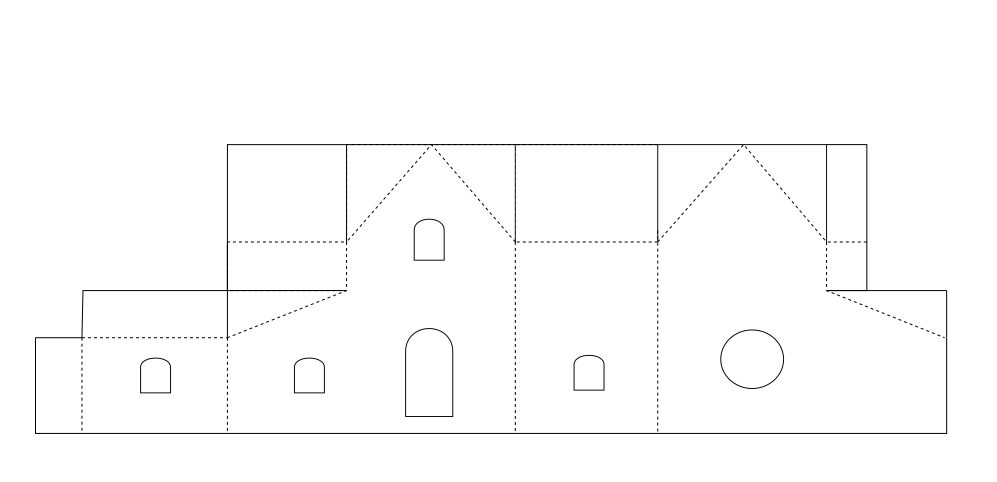
Since that initial pattern was so crazy, you will like the new and improved pattern so much better. It's much more straightforward.
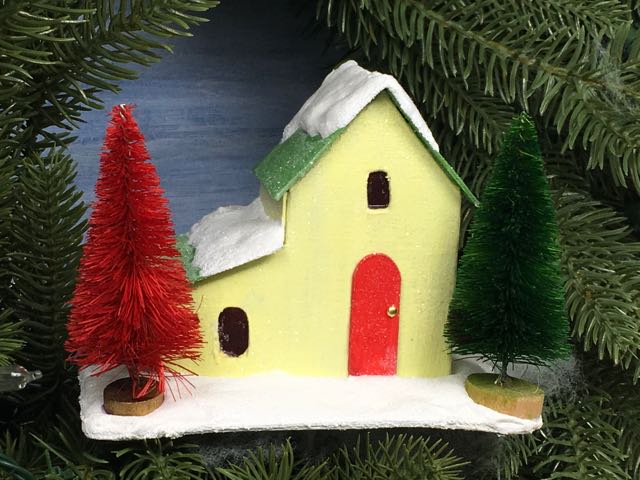
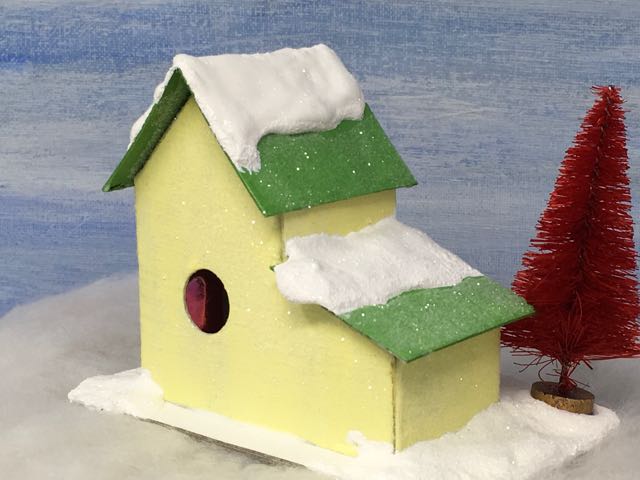
Here are two other views of the Split Level Christmas house.
This post contains some affiliate links for your convenience. Click here to read my full disclosure policy
Materials to Make the Split Level Christmas Putz House
- Download the Split Level Christmas Putz House No. 12 pattern - Design No. 39 - in the Paper Glitter Glue library
- Cutting machine - I love my Cricut Maker, but you can also use a Cricut Explore Air, or even the Cricut Joy with a foil tip for scoring. You can also use other cutting machines.
- Cutting mat - I love this glass mat by Tim Holtz
- Cutting utensils – craft knife and scissors if cutting by hand
- Metal edge ruler
- Cardboard – I like 30 pt cardboard, but poster board works
- PVA Glue – I like these two: Aleene's Quick Dry Tacky Glue, Bearly Art Glue, and Glossy Accents
- Tracing paper, if hand cutting
- Stylus for tracing
- Painter’s tape – love this Painter's tape
- Paints:
- Gesso
- Ranger Distress Paints:
- Antique Linen
- Ranger Grit paste for texture on the walls of the house
- Clear acetate for the windows - optional
- Alcohol ink to stain the windows - optional
- Christmas embellishments of your choice - I love these bottlebrush trees
- Rock Candy Glitter - my favorite glitter
- Snow-Tex
General Directions to make the Split Level Christmas Putz House
- Download the Split Level Christmas Putz pattern - Design No. 39 - from the Paper Glitter Glue library
- Cut out the pattern
- If cutting by hand, copy the pattern onto cardboard or card stock
- Score the fold lines before you cut out the house
- Cut out windows and door on the house
- Fold along the score lines
- Glue the house together along the side glue tab
- Glue the main roof flap in place
- Next, glue the side roof flap and side piece in place
- Prime, paint the house and base if you are making it out of cardboard
- Add the windows and door to the house structure
- Glue the main roof piece first.
- Adhere the side roof piece in place.
- Glue the house to the cardboard base
- Now the fun begins – decorate your little house
Download the Split Level Christmas Putz House No. 12 pattern:
You can get the free pattern to make this little village house in the Paper Glitter Glue Library. Just subscribe to my newsletter with the form below if you haven’t already done so and you’ll get the password right away. Then you will have access to all my patterns.
The Split Level Christmas Putz house is no. 39 in the Paper Glitter Glue library. It's available as a printable PDF file as well as SVG files for your cutting machine.
The 12 House of Christmas houses can be found as a group in the 2018 section of the Paper Glitter Glue library. They are designs 28-39.
This post contains some affiliate links for your convenience. Click here to read my full disclosure policy.
Cut Out the Putz house pattern
If you use a cutting machine like a Cricut Maker, here's how the pattern looks in Cricut's Design Space. First, you'll see the pattern when uploaded to Cricut Design Space.
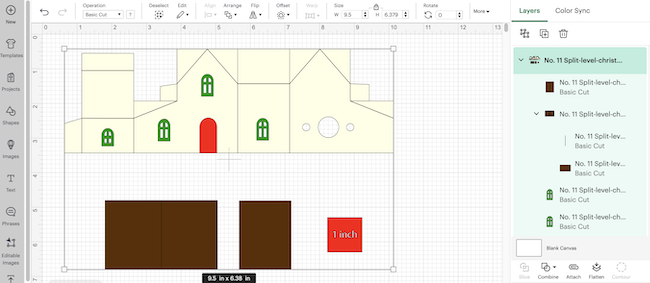
Notice the score lines on the main body of the house.
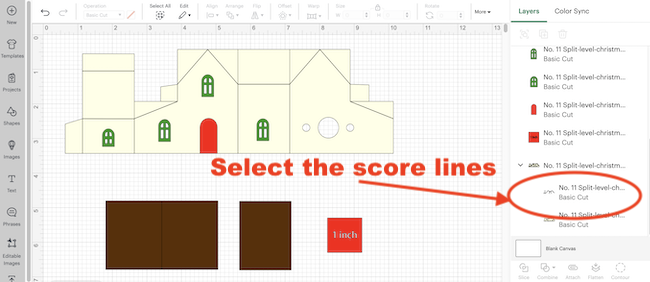
Click on this group of lines. When you do so, the color box next to the operations menu will be red. I make all my score lines in a red color to distinguish them from cut lines.
Now go to the operations menu on the left upper side and choose SCORE. Then attach the score lines to the piece it is grouped with.
Do the same thing for the roof score line.
Now you can cut it out with your cutting machine.
Fold along the score lines
Fold along the score line and then glue the side glue tab to make the main structure of the house.
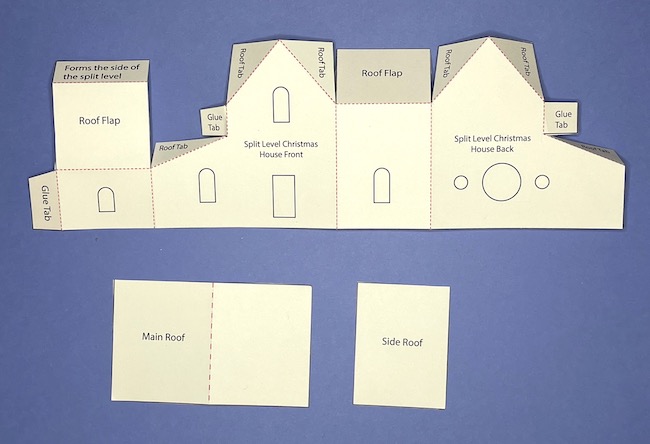
Glue the main structure together along the side glue tab
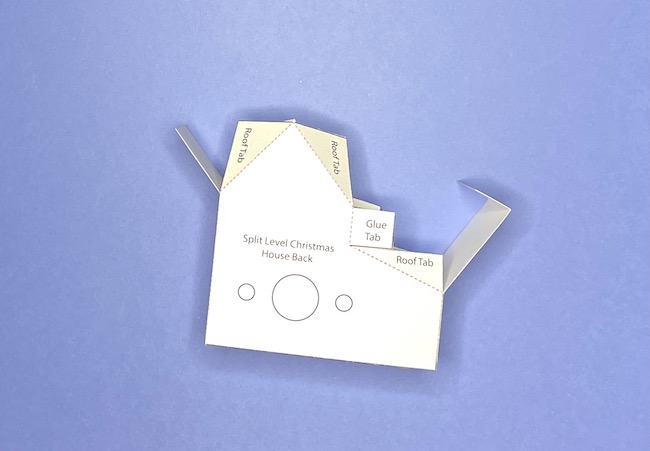
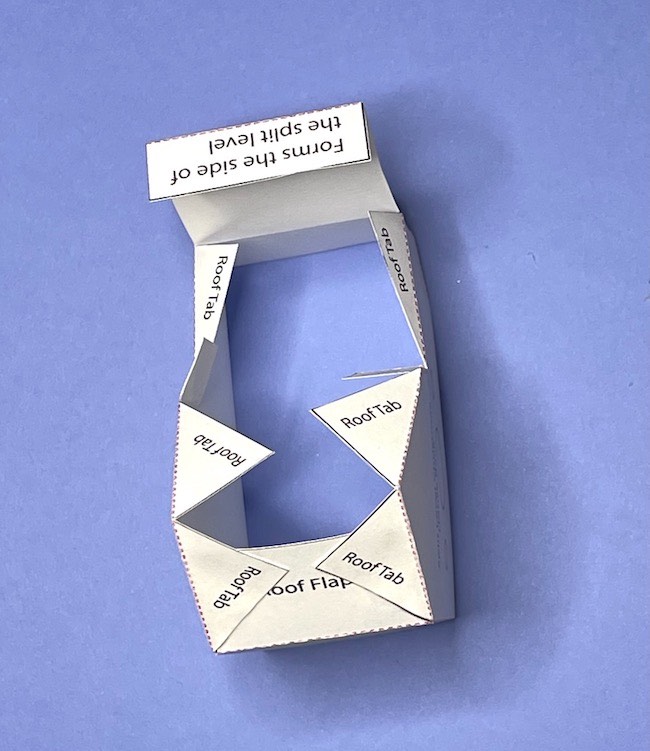
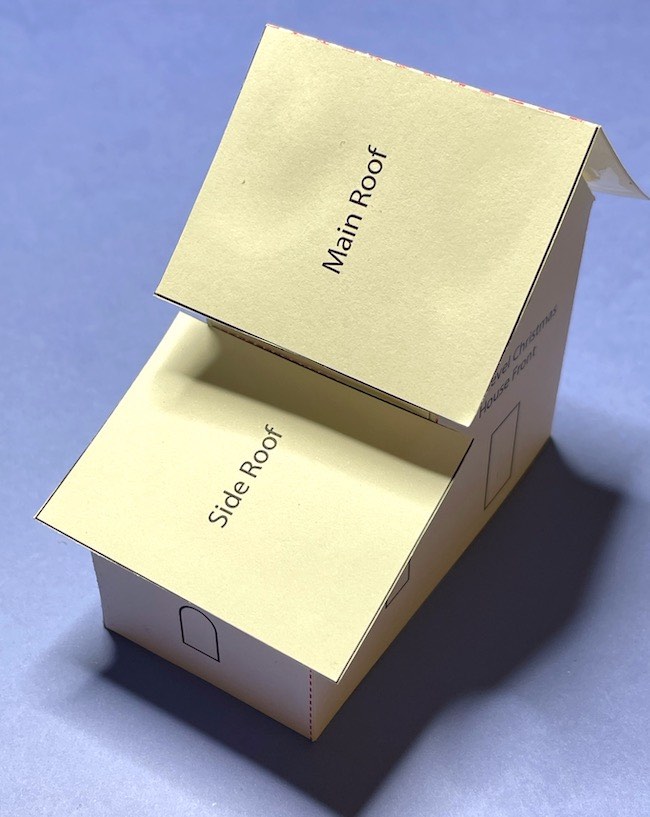
Glue the main roof flap in place
You can see that in the photo below.
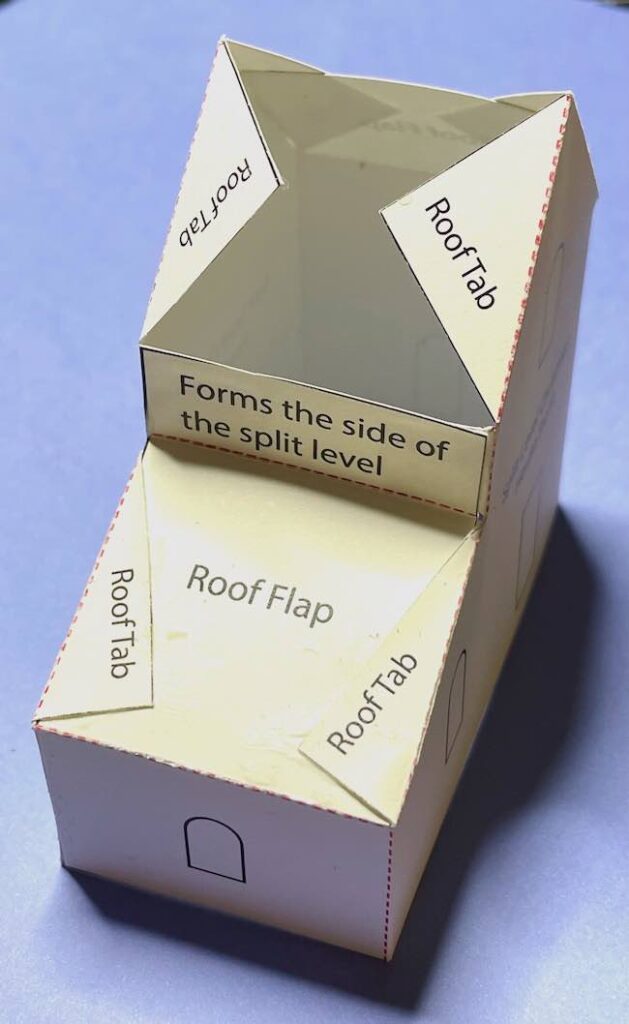
Glue the side roof flap and side strip in place
The side roof flap is show at the bottom of the photo below.
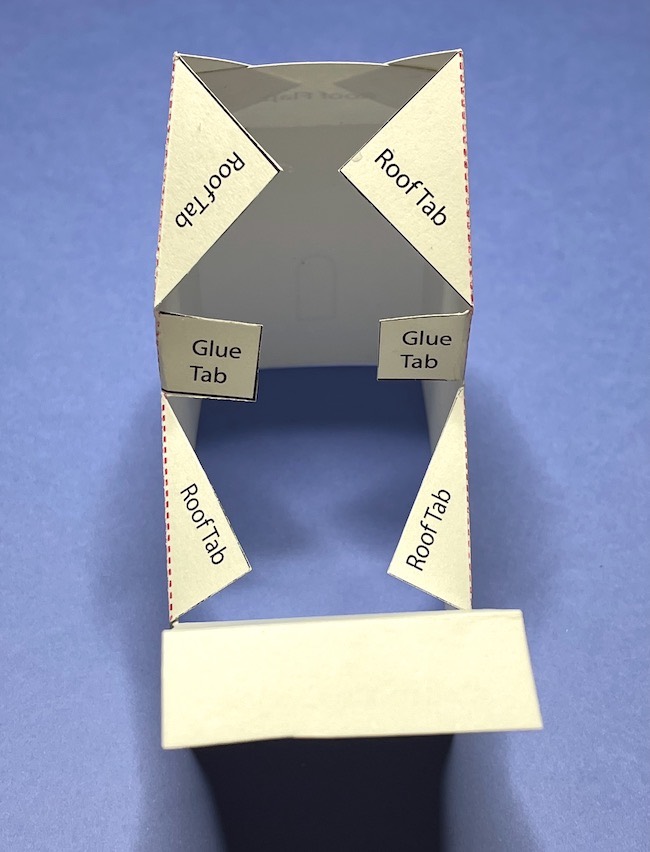
Apply glue to the side glue tabs and the roof flaps.
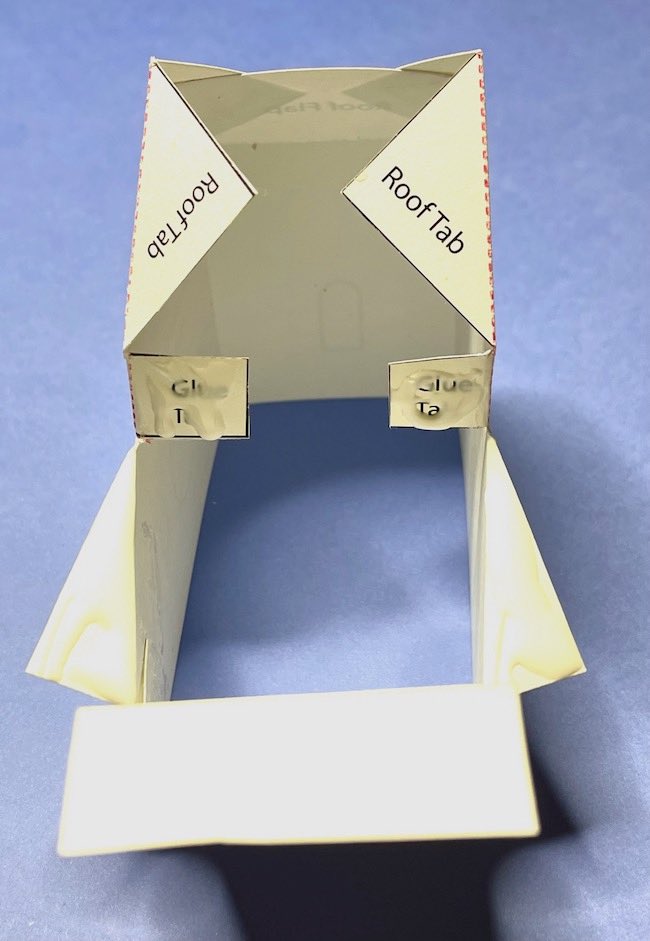
Next glue the side roof flap in place. The most important thing to remember here is to line up the side piece first.
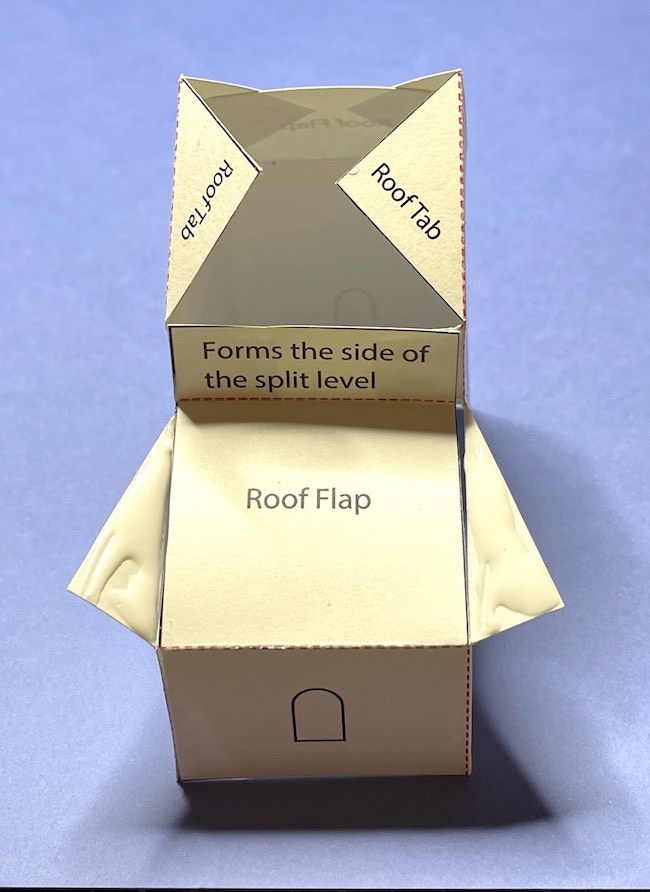
Now glue down the roof tabs ON TOP OF THE ROOF FLAP.
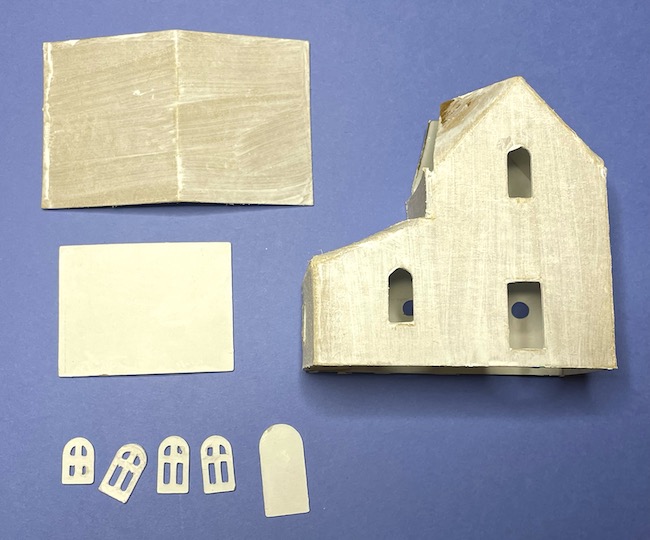
For cardboard houses, prime and paint before you adhere the roof pieces
Obviously, if you make the house out of card stock, you don't have to do that. But I do love to paint and decorate my little cardboard houses.
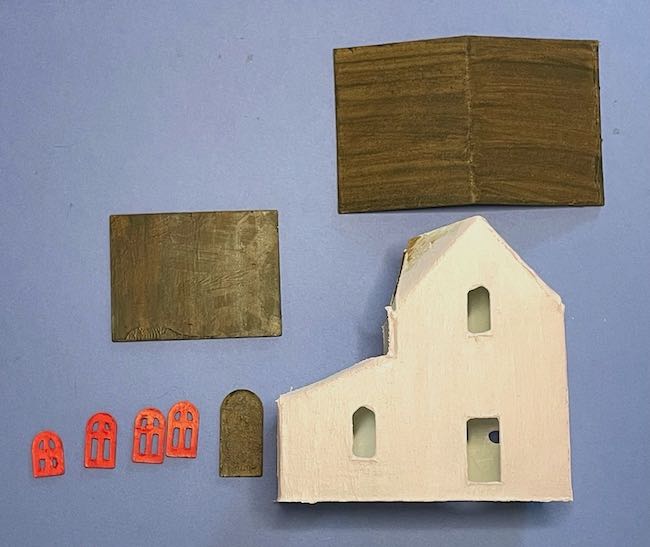
Glue the windows and the door on the little house
After painting the house pieces, glue on the windows and the door.
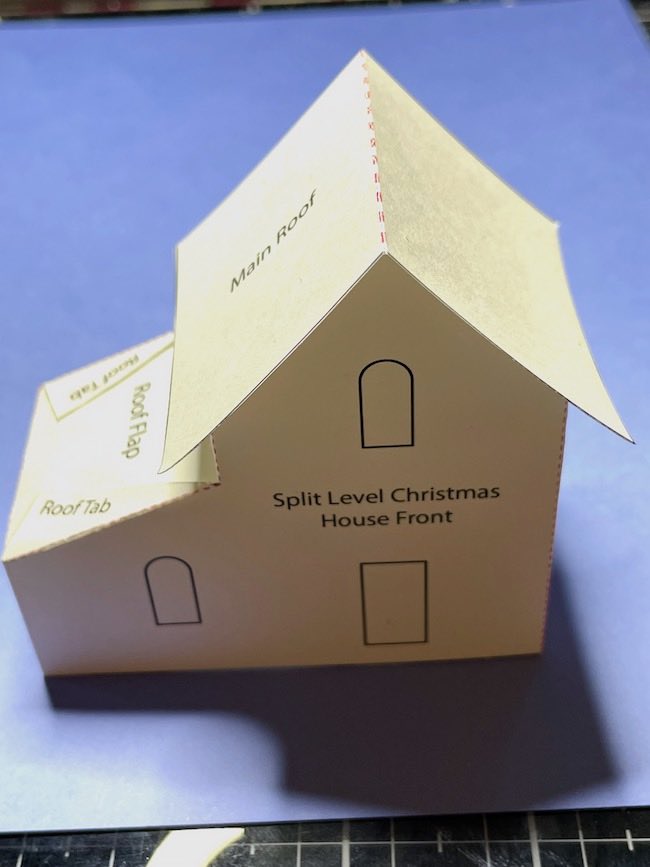
Glue the main roof piece on the top of the house
Next, glue the main roof on top of the main gable side as shown on the prototype below.
Finally, glue the side roof on the Split Level Christmas Putz house
When you glue the side roof in place be sure to glue it so that the wider part matches the width of the main roof.
Glue the house to the base
Make the base by gluing 3 layers of cardboard together.
Just apply a thick bead of glue to the base of the house and adhere to your base.
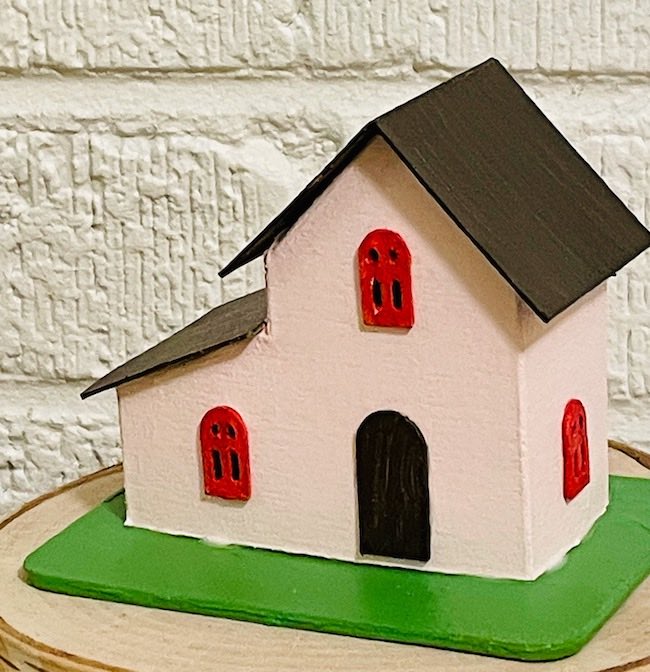
Decorate your little house
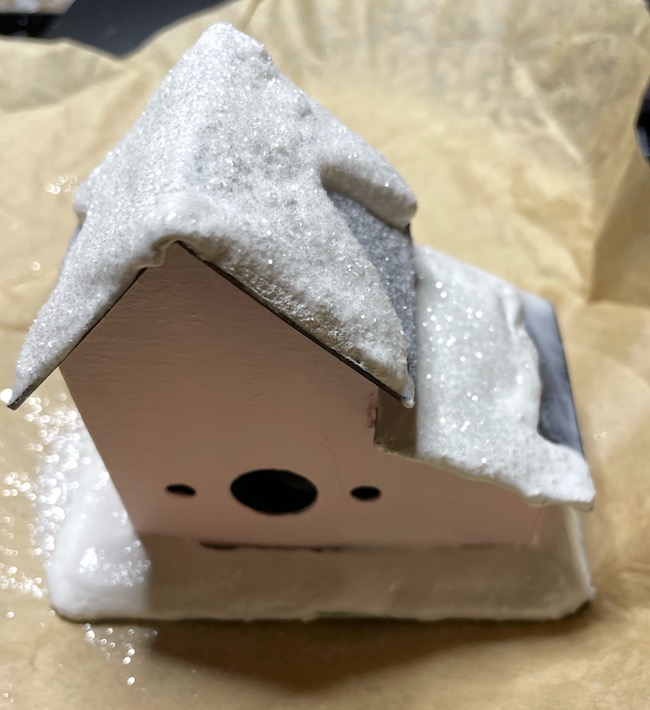
For this house, I first applied Snow-Tex to the roof then let it dry.
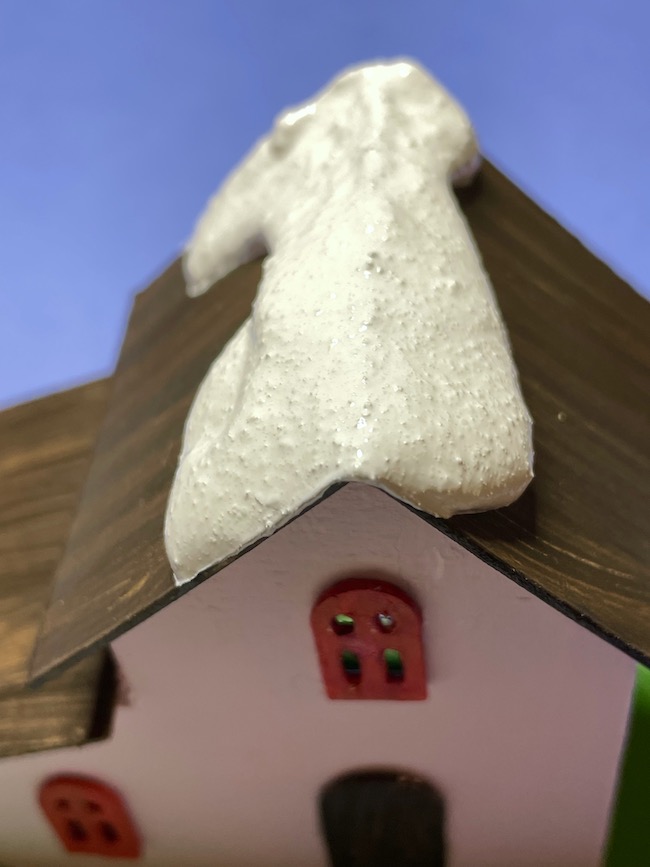
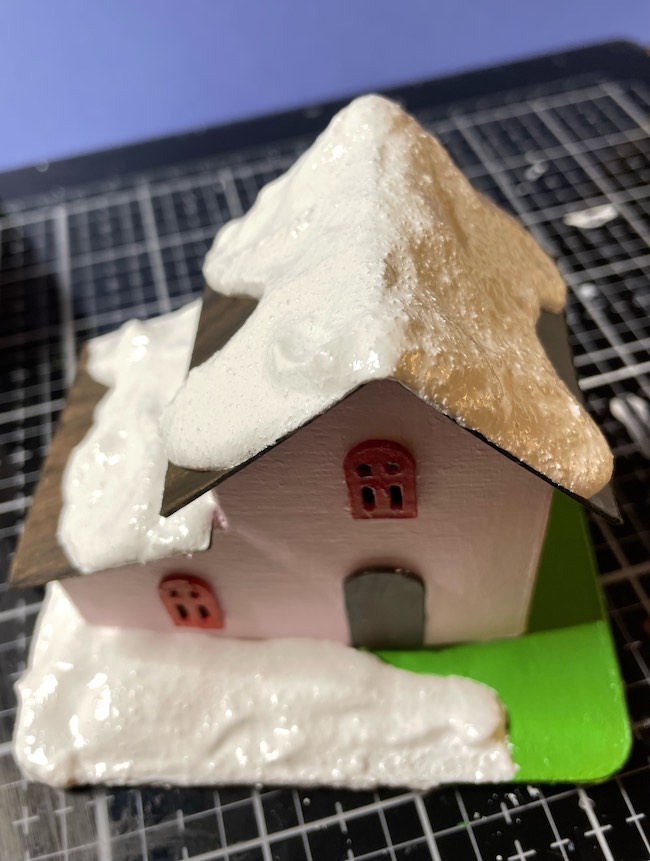
Once the Snow-tex is dry, paint the roof with Mod Podge, then sprinkle glitter on the snow.
Thank you for stopping by and reading about the Split Level Christmas house. I love to see your creations. Please share them with me at my Papercrafting Facebook group or email me - [email protected].
If you haven't already, check out the other 12 houses in the series:
- 12 Houses for Christmas Challenge
- Christmas Putz House No. 1
- Christmas Putz House No. 2 – Log Cabin Putz House
- Christmas Putz House No. 3 – Twin Gable Front Putz House
- Christmas Putz House No. 4
- Christmas Putz House No. 5 – Little Church with Side Steeple
- Christmas Putz House No. 6 – Frosty Barn
- Christmas Putz House No. 7 – Round Arch House
- Christmas Putz House No. 8 - Happy Holiday House
- Christmas Putz House No. 9 - Swiss Chalet
- Christmas Putz House No. 10 - Snowy Church
- Christmas Putz House No. 11 - Winter Cottage
- Christmas Putz House No. 12 - Split Level House
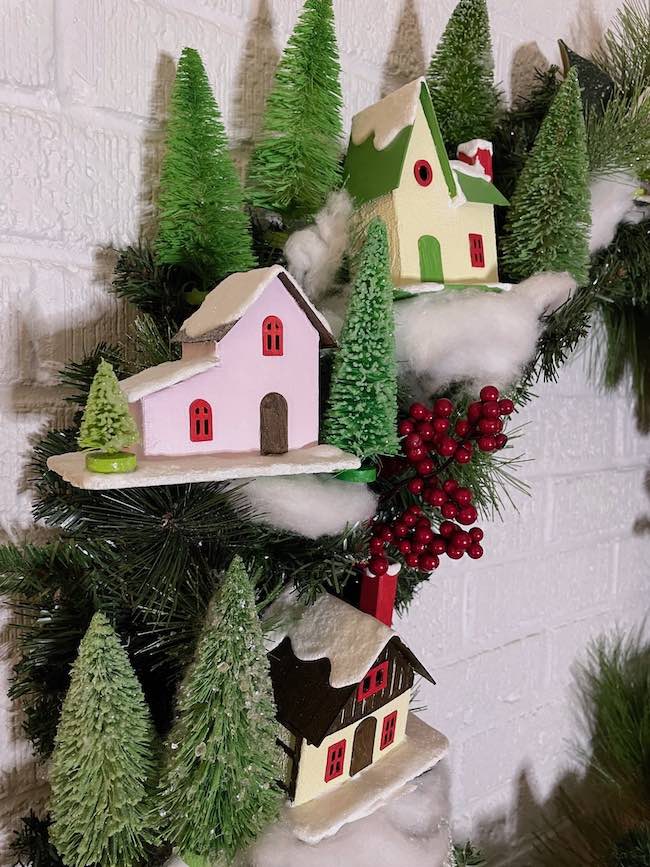
- Winter Village Wreath - where all the little houses reside now
And I am happy to help if you have questions as well.
Lucy



Janet
Gee, Lucy. This little house looks like so much fun. I'll have to come back and get the others too. I'll post when I finish this one. Thank you for sharing your patterns.
Misty D Riley
Lucy- THANK YOU for creating, and for sharing, all these wonderful projects and the patterns that you worked so hard on!! We really appreciate your creativity, we just love your little houses and all the pinatas!! I understand how hard pattern work can be m, especially to teach yourself, and I just want you to know how very much your work and effort is appreciated! We will be publishing something, hopefully soon, and you are going to get credited for your patterns and tutorials that we went to paperglitterglue.com for!!
Thank you again, and warmest, happiest wishes, Misty, Paper Stars
Lucy
Thank you so much. I look forward to seeing your creations!!
Lucy
Martin
I love all of your ideas, but you really need to work on the navigation on the site. I have been trying for over 20 minutes trying to get the plans for the split level house. You keep going in circles and being sent back to the library. Please tell me what I am doing wrong.
Lucy
Martin,
All the files are in chronological order. So the Split Level House was made in December 2018 section of the library. The search function button doesn't work on the library page because it searches the entire blog which will lead you in circles. I don't know how to disable the search function on just one page, but I will look into it.
I sent you an email with more specific instructions. I hope that helps. Please let me know.
Lucy