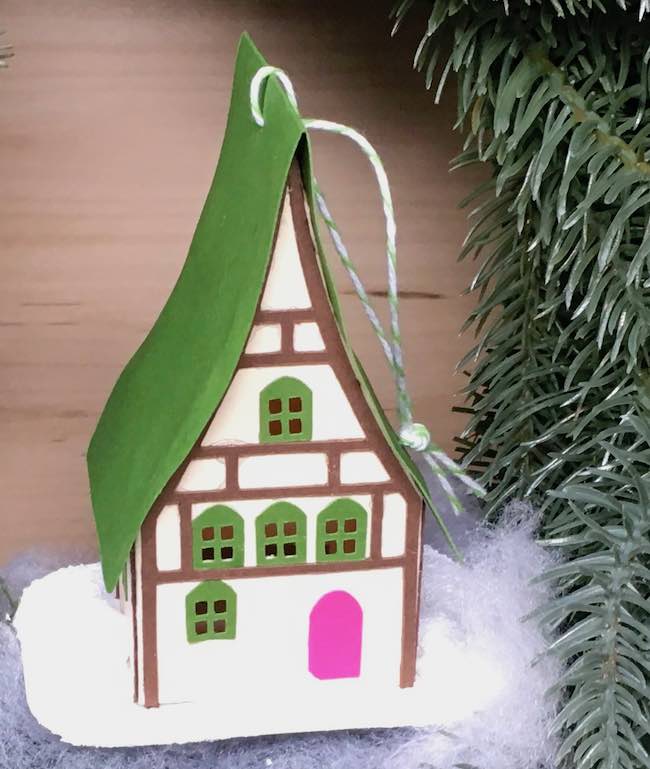
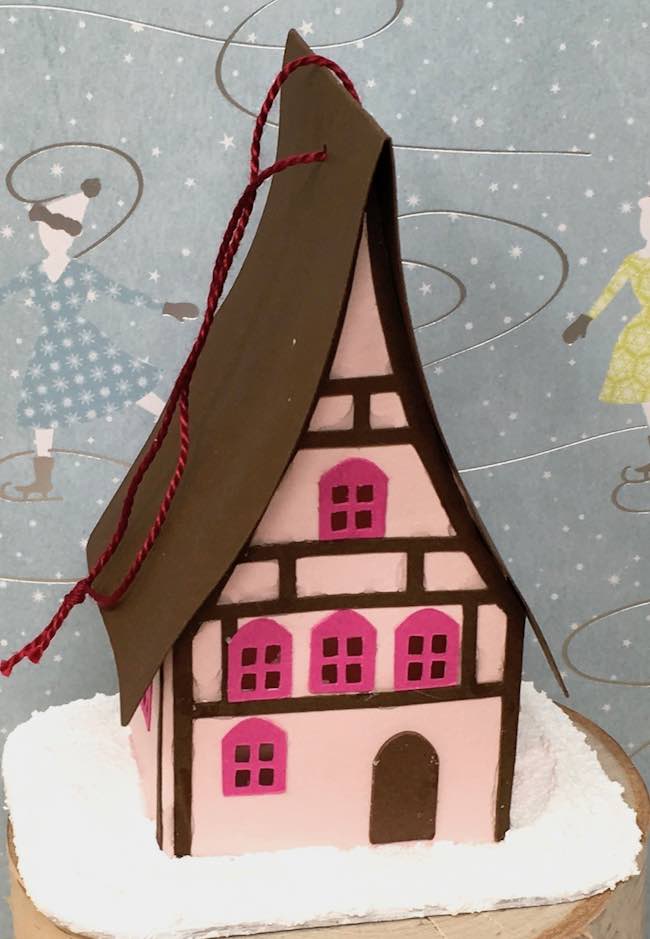
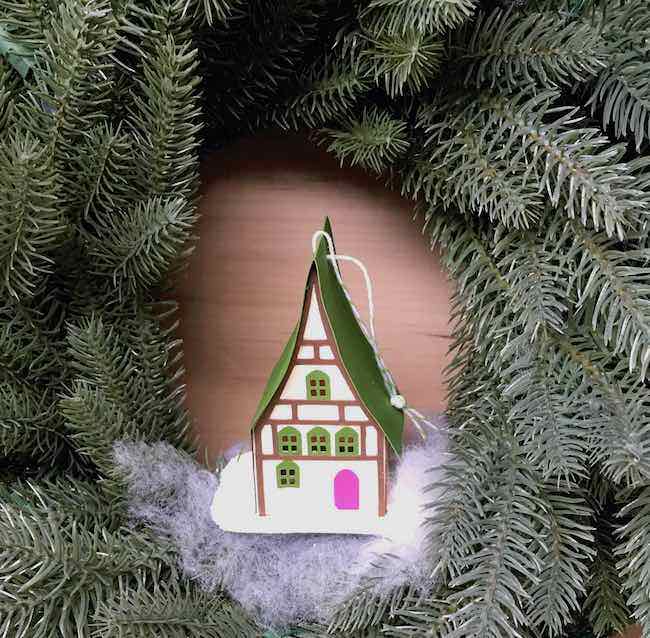
I am so excited to show you this cute little holiday paper house designed as an ornament to hang from your tree. It's made of card stock that you can cut out quickly on your Cricut or Silhouette. But most important is that it is seriously adorable. Well, that's what I think.
This paper house pattern is a kind of a merger between several houses I've made in the past, but I shrunk it down and simplified it for your convenience. This style is a known as Tudor house or a German Half-Timbered house which is very appealing to me. I wrote a bit about it when I made the Christmas Village house. It is also very similar to the Medieval Halloween House.
Let me know what you think.
This is craft no. 10 in the 15 Days of Holiday Craft Series. Here is a list of the other crafts:
- Red Roof Holiday Cottage
- Merry ChrisMoose Gift Box – DIY Mini Holiday Piñata
- Mini Paper Christmas House with Barn Shaped Gable (the Green Gable house)
- Gingerbread Paper House – made with Gingerbread Paint
- DIY Gnome Gift Box
- Scotty Dog Gift Box
- DIY Paper Wallet for Holiday Gift-Giving
- Paper Gingerbread Ornaments – Scented Gingerbread Men
- Happy Hollydeer Piñata Candy Box
- How to Make a Paper House Ornament for the Holidays
Here's how to make the Holiday Paper House Ornament.
This post contains some affiliate links for your convenience. Click here to read my full disclosure policy.
Materials for making the Little House Ornament:
- Card stock - Design No. 70
- A way to cut out the pattern for the Holiday Paper House - I used my Cricut
- Glue - here are two good options - Art Glitter Glue and Elmer's Precision Pen
- Cardboard for the base
- Twine
- Snow-Tex, optional
- Glitter, optional - this is my favorite
And here is a brief outline of how to make the little Paper House Ornament:
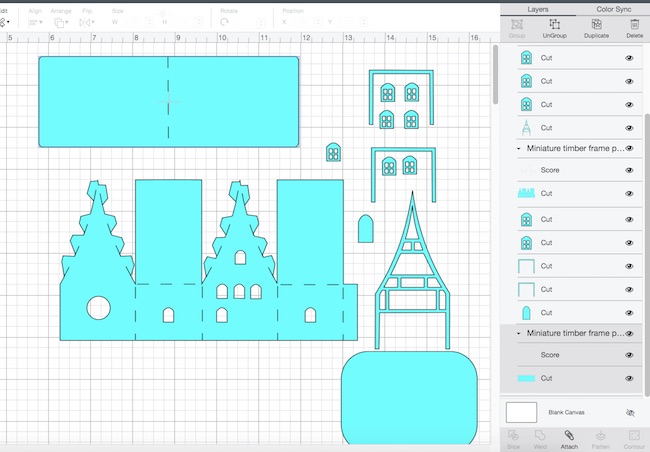
- Download the free pattern - Design No. 70 - from the Paper Glitter Glue Library
- Cut out the pattern
- Fold along score lines
- Glue on the door, windows, timber framing
- Now glue along the glue tab to assemble the house
- Glue the two roof flaps together
- Next glue the roof tabs to the roof flaps
- Adhere the roof to the little paper house ornament
- When the glue is pretty dry, punch a hole in the roof for the twine
- Thread twine through the hole and tie
- Make a base
- Glue the house to the base
- Add snow if desired
First you need the pattern for this little paper ornament
Download the pattern from my Paper Glitter Glue library. If you already have the password because you subscribed to my newsletter, then just go to the library, click the link which takes you to the page where you type in the password. Then you get instant access to all of my free files in the library.
But if you need the password, just subscribe to my newsletter using the form below and you will get the password immediately. I also include it in every newsletter in case you don't remember it.
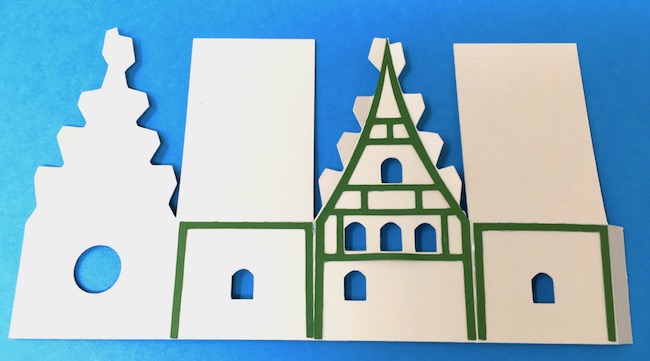
Cut out the pattern for the Holiday Paper House Ornament
Next cut out the pattern by hand or with your automatic cutting machine. I used my Cricut Explore Air 2. It was so easy. That's how I could make so many of them fast. There are a few score lines on the body of the house itself and one score line on roof piece, but that's it. So be sure to designate the score lines as score lines and attach them.
Fold along score lines
Before you get started, fold along the score lines. That helps you place the timber frame pieces easier.
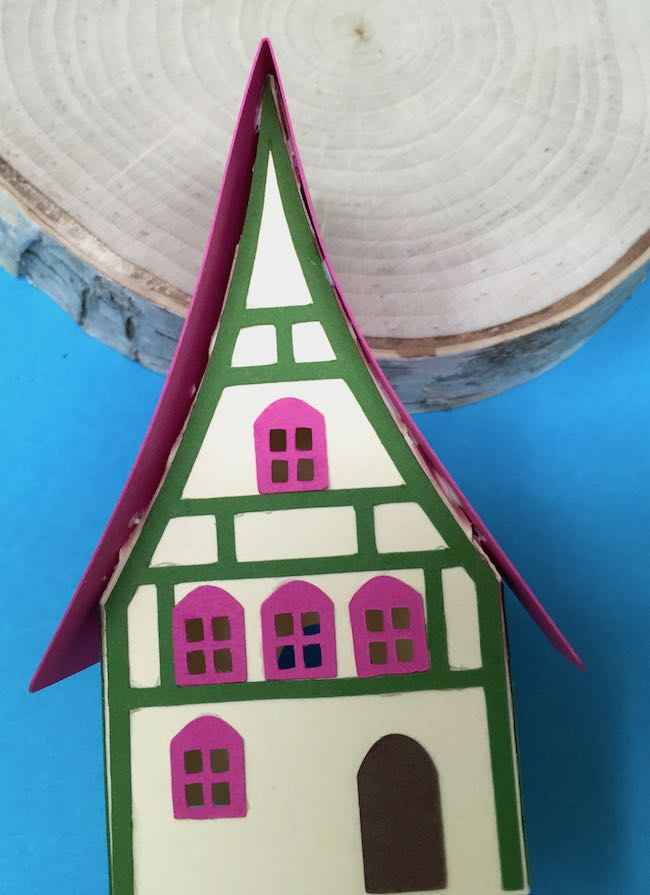
Glue on the door, windows, timber framing
Next glue on the door, the 7 windows, and the timber framing pieces as shown the photo below.

Now glue along the glue tab to assemble the house
Once all the decorative pieces are glued on, apply glue to the glue tab on the side of the house and glue the house together
Next glue the roof tabs to the roof flaps
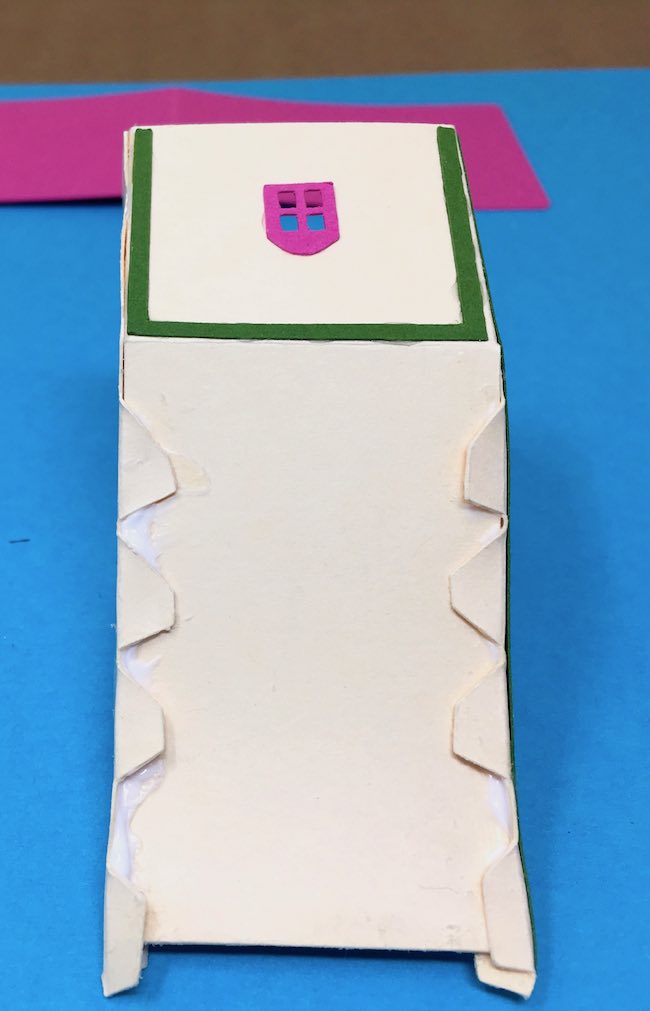
Now glue the roof tabs to the roof flaps. First apply glue to the the taps and the edge of the roof flaps. The roof tabs are pretty small so sometimes it's hard to get them to stick down. The main thing to do is to glue the very top two roof tabs to the roof flaps. That ensures that the gables are supported. The other flaps will glue down better when you apply the roof.
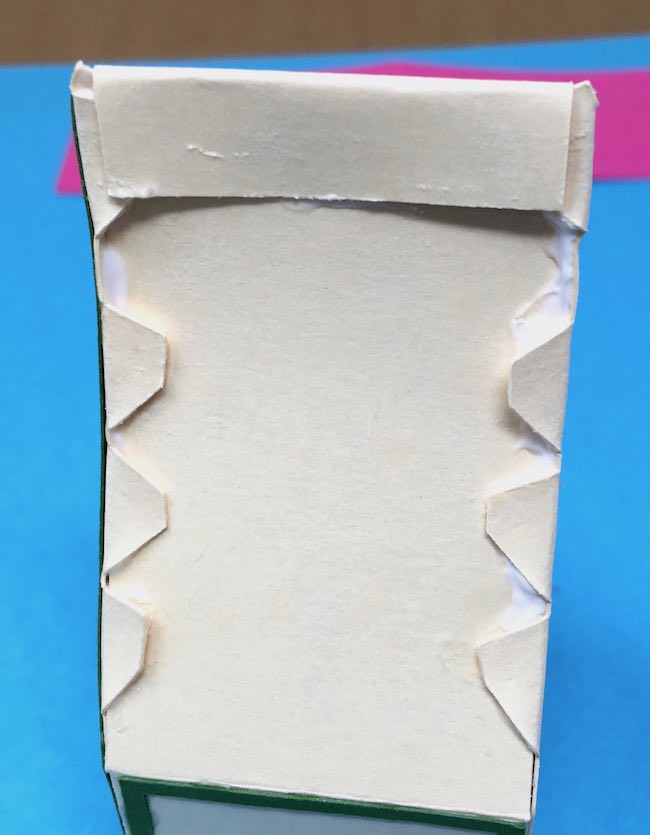
Here's an optional step that I think prevents the roof from tearing when you sew the twine at the top. Cut and fold a piece of scrap card stock at the top of the roof and glue it down. This adds an extra layer of paper to the roof top that will help prevent tear out from the twine.
Adhere the roof to the little paper house ornament
Next fold the roof along the score line. Apply glue all along the top of the roof tabs and the top of the roof flaps as well as the bottom of the roof flaps at the score line. Then smear some glue on the roof flaps as well.
Apply the roof and center it over the house. Hold it in place.
When the glue is pretty dry, punch a hole in the roof for the twine
You can use a tiny hole punch for this or just poke your needle through the card stock. But since you are going through about 6 layers of card stock, it's a little challenging to get the needle through that many layers. That's why I use the hole punch.
Thread twine through the hole and tie so you can hang the ornament
For twine I used some baker's twine or embroidery thread.
Make a cardboard base for your little paper house ornament
To make the base, just cut out 2 layers of cardboard for each house and glue together. There's a piece in the pattern for the base if you want to use that. If you want to add light to your house from underneath, cut out a hole in the bottom of the cardboard base. I didn't worry about that though.
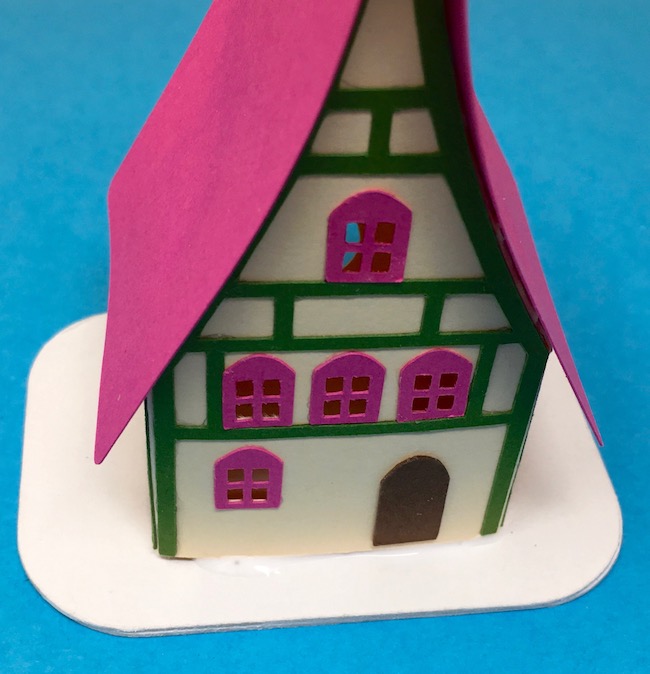
Glue the paper house ornament to the base
Now glue the house to the base. I also add a little card stock flange here (just like on the roof) to make a larger gluing area. Once that is in place, apply a bead of glue all along the edge of the house and on the flanges.
And then apply the house to the base and hold.
Add snow and glitter to your paper house ornament, if desired
If you want to add snow, just apply it after the house is stuck to the base. Let dry. I haven't glittered my houses yet, but I will. I'm going to use the Ranger Distress Clear Rock Candy Glitter because of subtle shine.
I am so happy about this set of little houses because I think people will really enjoy seeing them hang from their Christmas trees. They just make the cutest little ornaments.
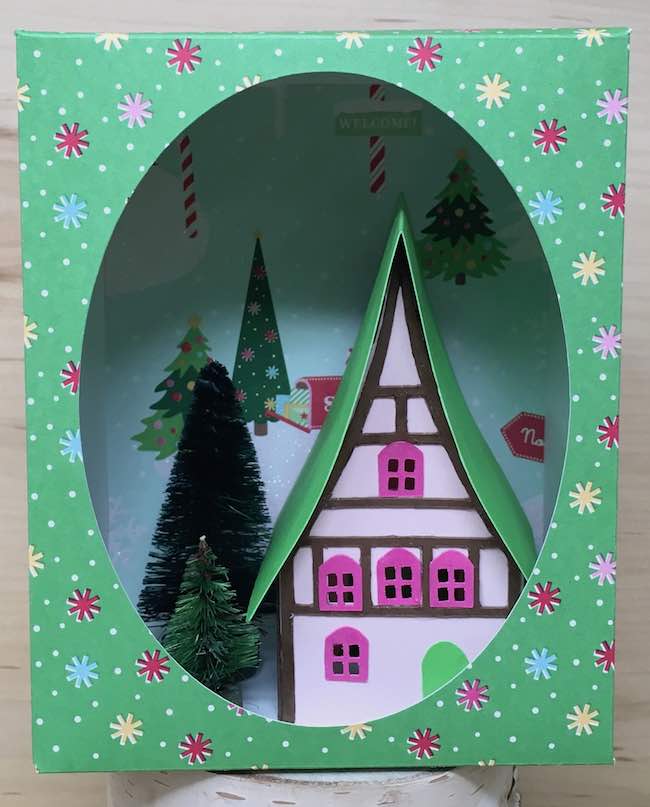
Oh, and the next project will be the miniature gingerbread paper house ornament and then a small display box where you can display your paper house ornament.
I hope you have a wonderful Christmas holiday.
Lucy
Be sure to pin to your favorite paper crafting Pinterest board.

Robin
Thank you I love this. I've made it with my Pazzle Vue cutter and my cricut joy
Thank you for sharing beautiful creativity.