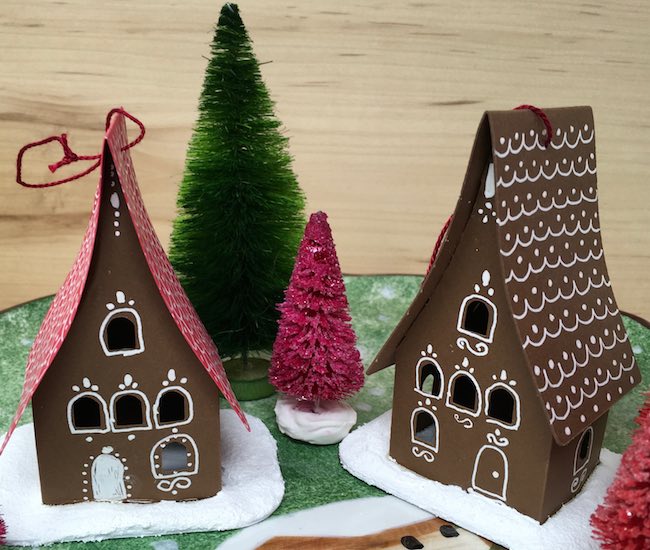
Now you can make an Easy Gingerbread House Paper Ornament that truly is quick and easy.
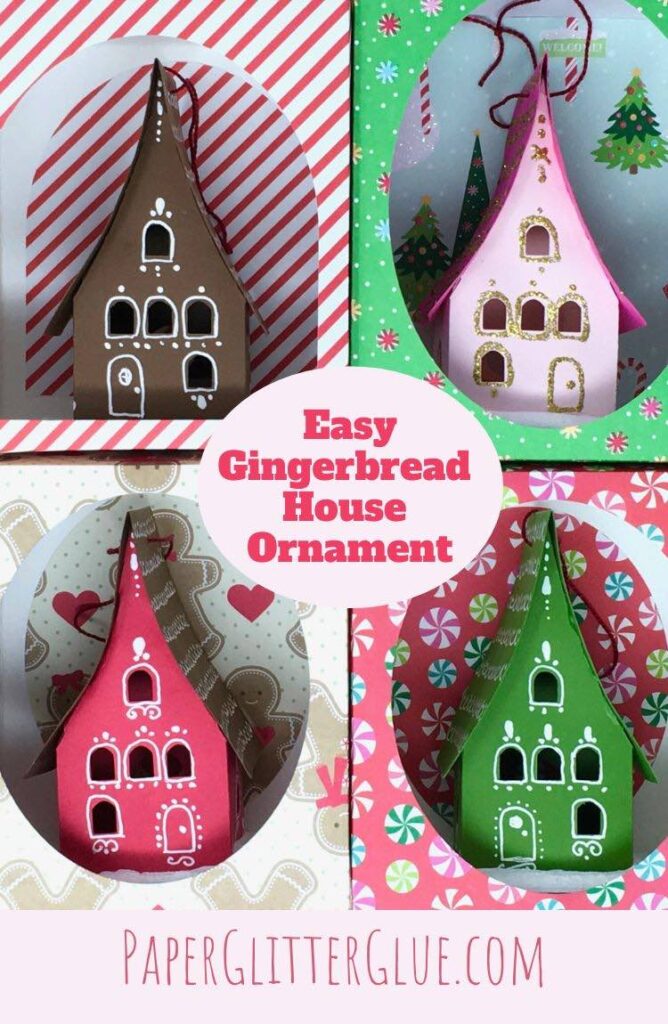
The Gingerbread House paper ornament uses the same pattern as the Holiday Paper House Ornament. The major difference is that instead of gluing the windows and doors on the house, you draw them on with a white pen. So this way you can decorate the house any way you want.
It's small and lightweight so you can hang it on a Christmas tree or a Holiday wreath.
This is holiday paper craft in the 15 Days of Holiday Craft Series.
- Red Roof Holiday Cottage
- Merry ChrisMoose Gift Box – DIY Mini Holiday Piñata
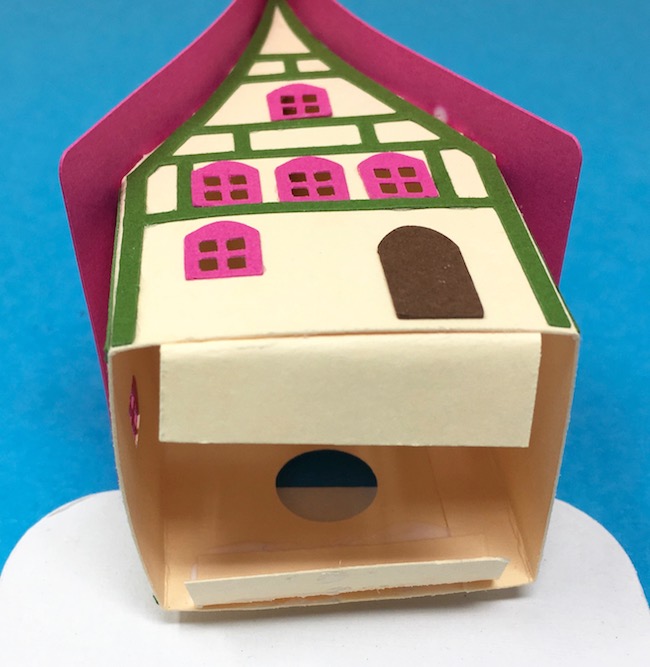
- Mini Paper Christmas House with Barn Shaped Gable (the Green Gable house)
- Gingerbread Paper House – made with Gingerbread Paint
- DIY Gnome Gift Box
- Scotty Dog Gift Box
- DIY Paper Wallet for Holiday Gift-Giving
- Paper Gingerbread Ornaments – Scented Gingerbread Men
- Happy Hollydeer Piñata Candy Box
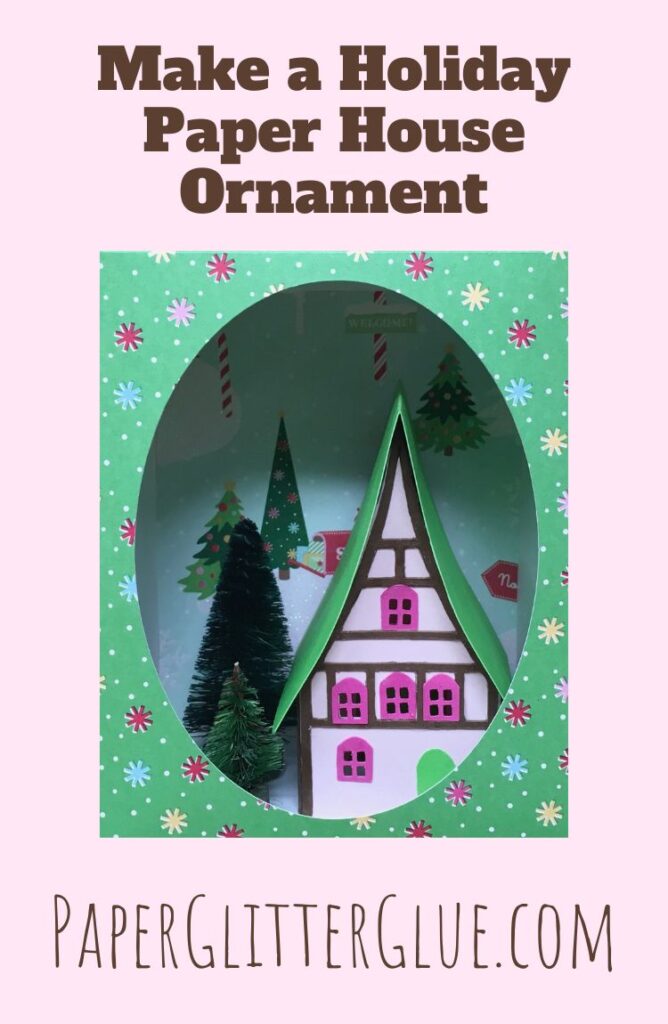
- How to Make a Paper House Ornament for the Holidays
- Easy Gingerbread House Paper Ornament
- DIY Display Gift Box for the Paper House Ornament
- Pull String Piñata - Miniature Firecracker Piñata
- DIY Bird Ornaments - Cardinal, Goldfinch, and Bluebird (counts as 2 projects)
Below are the directions for making the Easy Gingerbread House Paper Ornament:
This post contains some affiliate links for your convenience. Click here to read my full disclosure policy.
Materials for making this Easy Gingerbread House Ornament:
- Pattern for Easy Gingerbread House Ornament - Design No. 149
- Way to cut out the Gingerbread Paper House pattern
- Cardstock - greater than 65# cardstock is best.
- Whte pen - my favorite is this Uni-Ball Signo white gel pen
- Glue
- Cardboard
- Gesso for priming the cardboard base
- Twine
- Tiny hole punch
- Snow-Tex
- Glitter, optional - here's my favorite glitter
Directions to make the Easy Gingerbread House Ornament:
- Free pattern - Design No. 149 - from the Paper Glitter Glue library
- Cut out the pattern
- Draw the white decorations on the card stock
- Glue the house together
- Glue the roof tabs to the house roof flaps
- Reinforce the top of the house for the twine
- Punch a small hole in the top to thread the twine
- Glue on tabs on the bottom of the paper house ornament
- Adhere the house to the cardboard base
- Paint on Snow-Tex
- Glitter, if desired
For more detailed instructions, read on below.
First download the free pattern from the Paper Glitter Glue library - Design No. 149
So the first step is to download the pattern from the Paper Glitter Glue library. And if you already have the password, just go to the first page of the library, click the link to the password page. Type in the password, and download the pattern labeled Easy Gingerbread House Ornament - Design No. 149. I updated it recently so it's in the November 2023 section of the library.
If you don't have the password, it's easy to get. Just subscribe to my newsletter with the form below and you will get the password right away. The first page you go to is the library doorway, there is a big orange button in the middle of the page which takes you to the page where you add the password. Then you go to the actual library where you can download any of the patterns you are interested in.
Cut out the pattern
Next cut out the pattern. It's pretty easy to cut by hand with a craft knife and a cutting mat, but it is even easier to cut out with a cutting machine like a Cricut or Silhouette or a ScanNCut. But for this Gingerbread House, you don't have to cut out the windows and trim.
The best card stock is 110# card stock because it is thicker. But the most common card stock you find is 65# card stock which works as well. It's just a little more fragile.
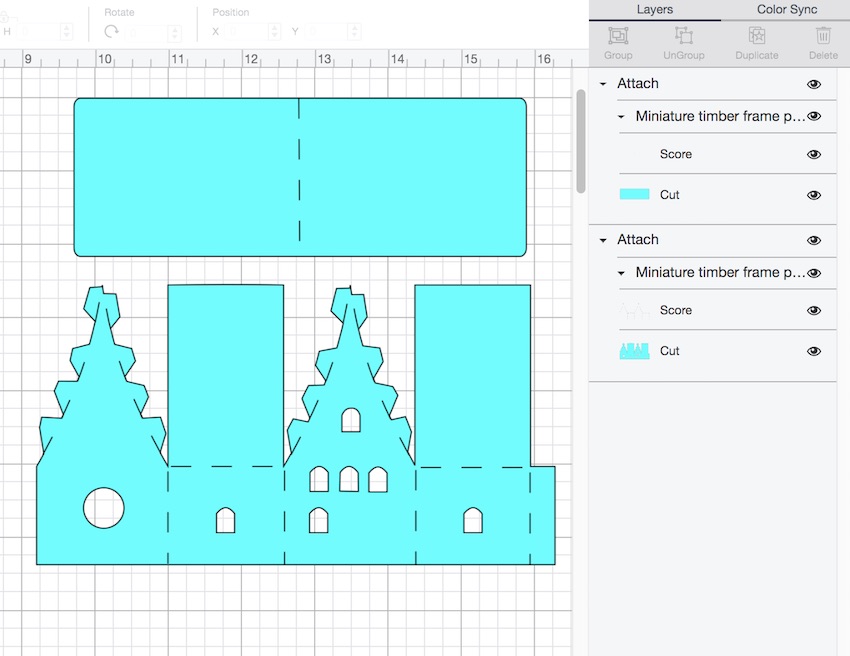
Here's how the pattern looks in Cricut's Design Space. All the score lines on the body of the gingerbread paper house and the roof are designated as score lines and attached.
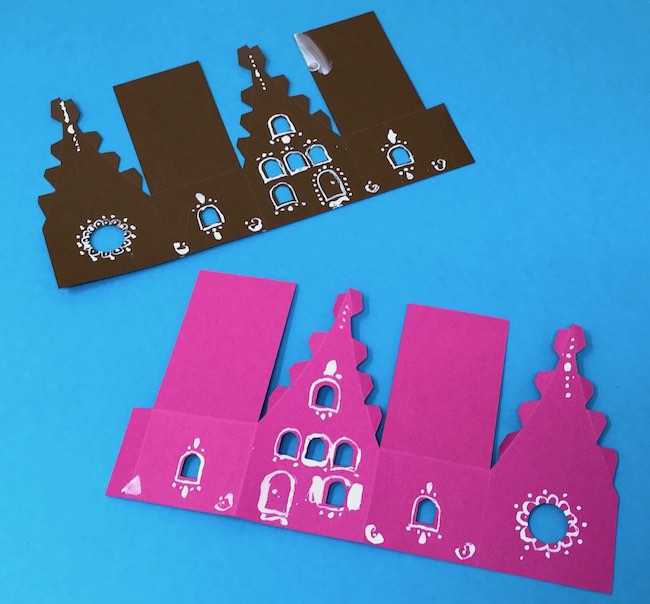
Draw the white trim decorations on the card stock
This is my favorite part of making the little gingerbread paper house. Basically, outline the windows, draw a door, and then add decorations. My favorite white pen is the Uni-Ball Signo White Gel Pen.
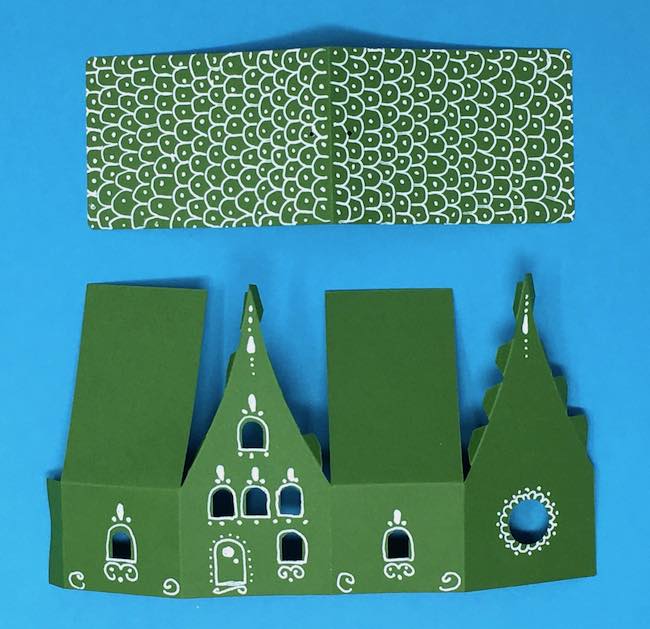
The decorated paper houses below are colored with white ink which doesn't work quite as well as the Uni-Ball White Gel pen.
Glue the paper house together
Next glue the side tab to the side of the house. Let dry.
Glue the roof tabs to the house roof flaps
Once the structure of the house is glued together, then glue the roof tabs to the roof flaps.
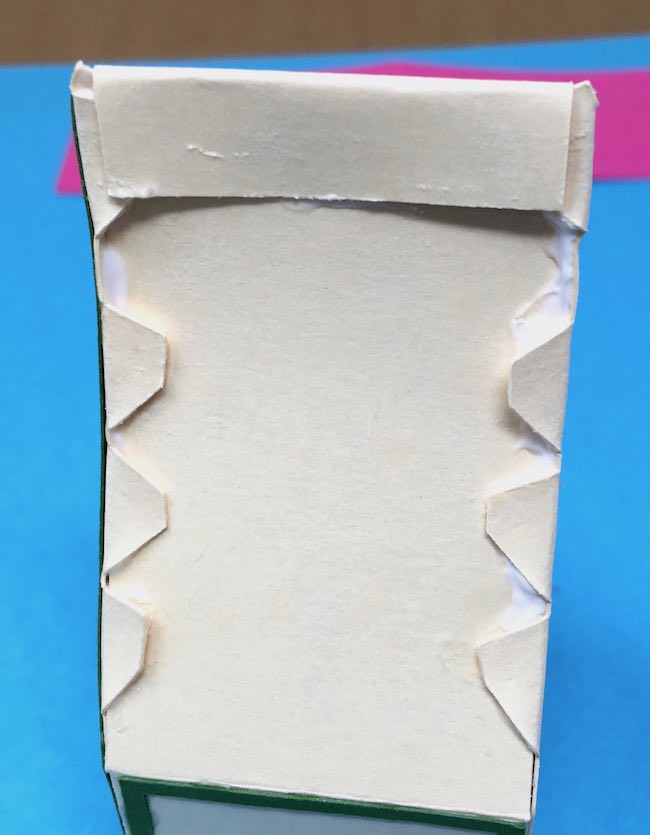
Reinforce the top of the house for the twine
Glue a cardboard tab to the top of the roof flap to make it stronger for hanging.
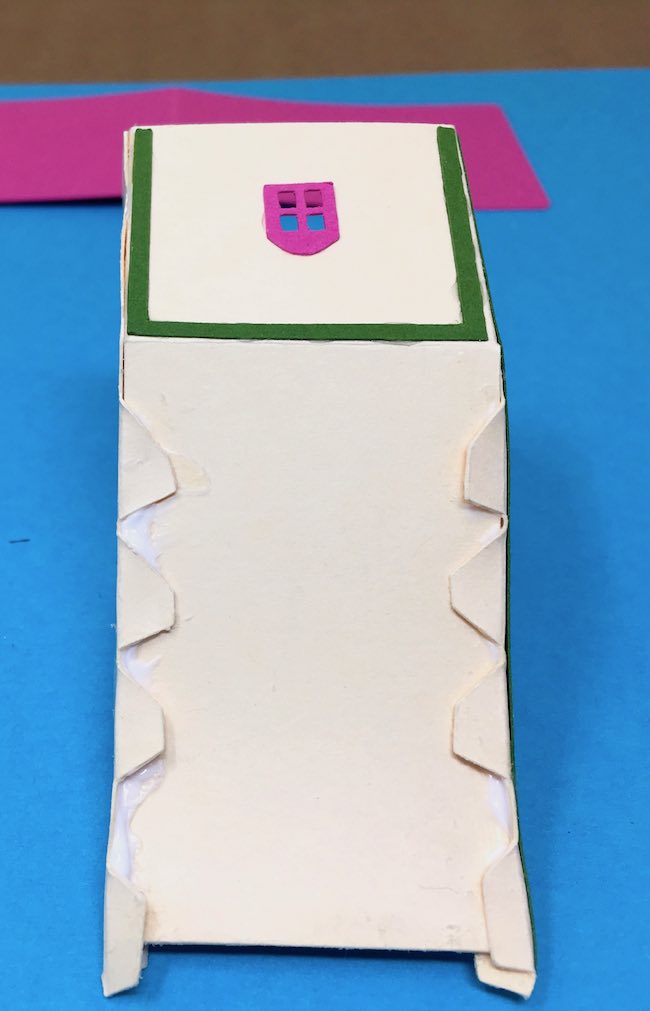
Glue on tabs on the bottom of the paper house ornament
Punch a small hole in the top to thread the twine
Make a small hole in the top of the gingerbread house so you can thread some twine through to hang the ornament. I use a tiny hole punch to make the hole, but you could just poke your needle through with the twine.
Adhere the house to the cardboard base
It's easy to make the cardboard base with 2 layers of cardboard. Prime it with gesso.
Now apply a thick layer of glue to bottom of the house and the flap. Then adhere the house firmly to the cardboard base.
Paint on Snow-Tex
Next, paint the Snow-tex around the little paper house ornament. Generally, I mix Snow-tex with some white gesso acrylic paint and a little Mod Podge to make it easier to spread. That way it is not so gritty.
Glitter, if desired
If you want to add glitter, paint the snow and the house with Mod Podge and apply glitter.
And that is how you make the Easy Gingerbread Paper House Ornament. I hope you will have fun making this little paper house. Thank you for reading.
Lucy
P.S. Please share your projects with me on my Facebook group, on Pinterest, or by email - [email protected].
Helen Roberts
These houses are adorable and will make a great project to do with the grandkids. They will have fun drawing the "icing" onto the houses. Thank you for sharing another wonderful project!
Lucy
Thank you, Helen. I would love to see your projects when finished.
]