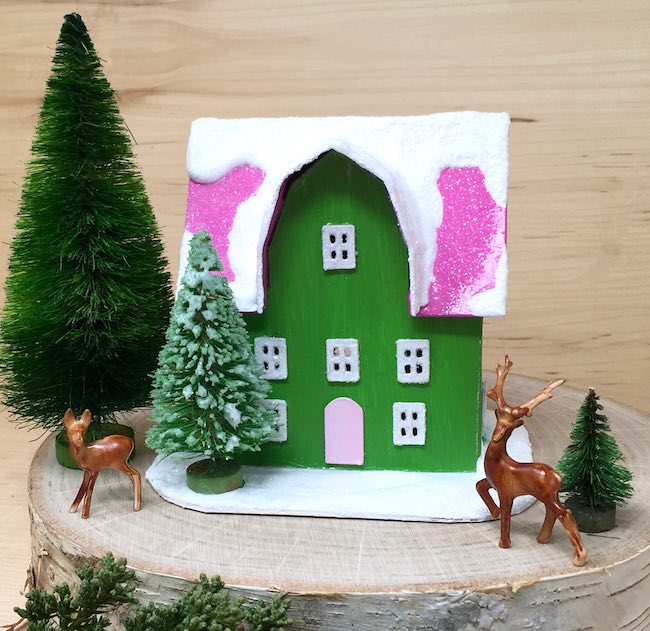
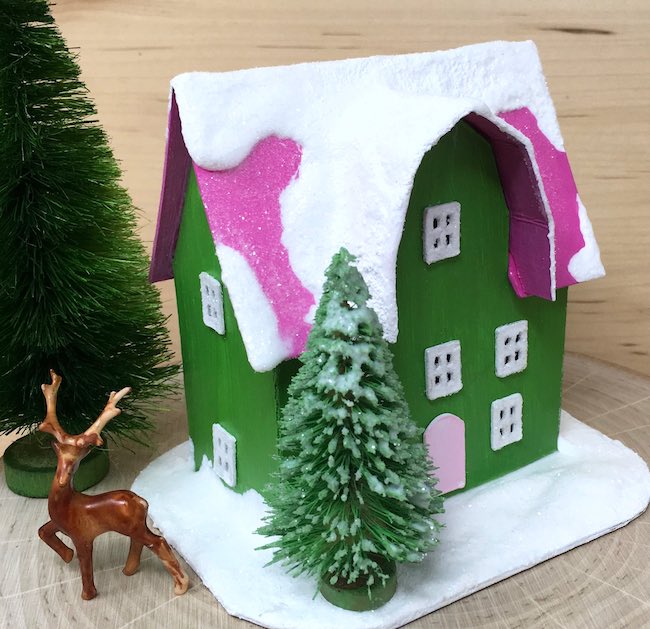
The Mini Paper Christmas House is a different and interesting miniature paper house that you can make fairly quickly because it's small and not too complicated. I drew the pattern yesterday and made the houses today. And the nice thing about little paper house like this is that they can fit anywhere in your Christmas decor. You can tuck them among your Christmas tree branches, add them to a wreath or decorate your mantle.
Or you can use the little house for other seasons.
So here we go for this miniature Christmas putz house with the barn-shaped front gable.
This is the another project of the 15 Days of Holiday Craft series. Did you see the Red Roof Holiday Cottage - that's the first Christmas house in the series. Here's the project list:
- Red Roof Holiday Cottage
- Merry ChrisMoose Gift Box – DIY Mini Holiday Piñata
- Mini Paper Christmas House with Barn Shaped Gable (the Green Gable house)
- Gingerbread Paper House – made with Gingerbread Paint
- DIY Gnome Gift Box
- Scotty Dog Gift Box
- DIY Paper Wallet for Holiday Gift-Giving
- Paper Gingerbread Ornaments – Scented Gingerbread Men
- Happy Hollydeer Piñata Candy Box
- How to Make a Paper House Ornament for the Holidays
- Easy Gingerbread House Paper Ornament
- DIY Display Gift Box for the Paper House Ornament
- Pull String Piñata - Miniature Firecracker Piñata
- DIY Bird Ornaments - Cardinal, Goldfinch, and Bluebird (counts as 2 projects)
This post contains some affiliate links for your convenience. Click here to read my full disclosure policy.
Materials for making this Mini Paper Christmas House
- Pattern from the Paper Glitter Glue library
- Cutting materials
- Cardboard
- Glue - Aleene's Fast Grab Tacky Glue is very useful here
- Mod Podge
- Gesso
- Green FrogTape - it's called FrogTape, not Green Frog Tape
- Paint:
- Martha Stewart Pink Carnation Satin
- Martha Stewart Green (forgot the shade)
- Tim Holtz Picked Raspberry
- Tim Holtz Candied Apple
- Embellishments:
Outline of directions to make this little cardboard house
- Download the free pattern template - Design No. 65 - from the library
- Cut out the mini paper house pattern
- Prime and paint the little house, the door and windows
- Glitter windows, if desired
- Glue the door and windows to the house
- Glue the house together
- Fit the roof on the house, glue
- Adhere the gable roof to the house
- Make the base
- Apply snow
- Glue the little house to the base and add embellishments
First download your preferred format template from the library
To get into the Paper Glitter Glue library you need the password. If you don't already have the password, you can get it by subscribing to my newsletter. Use the subscription form below. And you will get the password right away when you subscribe. I also put the password in all of my newsletter emails.
In the Paper Glitter Glue library, this file is design no. 65. It is available in 3 formats:
- SVG format or the Scalable Vector Graphic format for many automatic cutting machines
- DXF format which works with laser cutters
- and good old PDF - portable document format for printing and for people who cut out these patterns by hand
All the files are in the library in chronological order with the most recent added last. The files are compressed in a zip file so they can be downloaded. But that means you have to unzip them or extract the files to use the patterns.
Cut out the mini paper house pattern
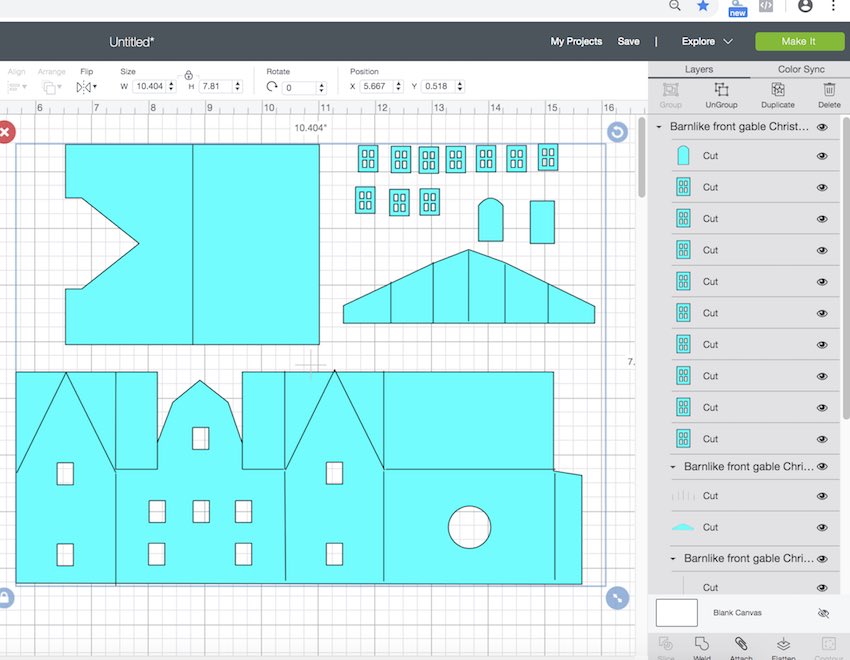
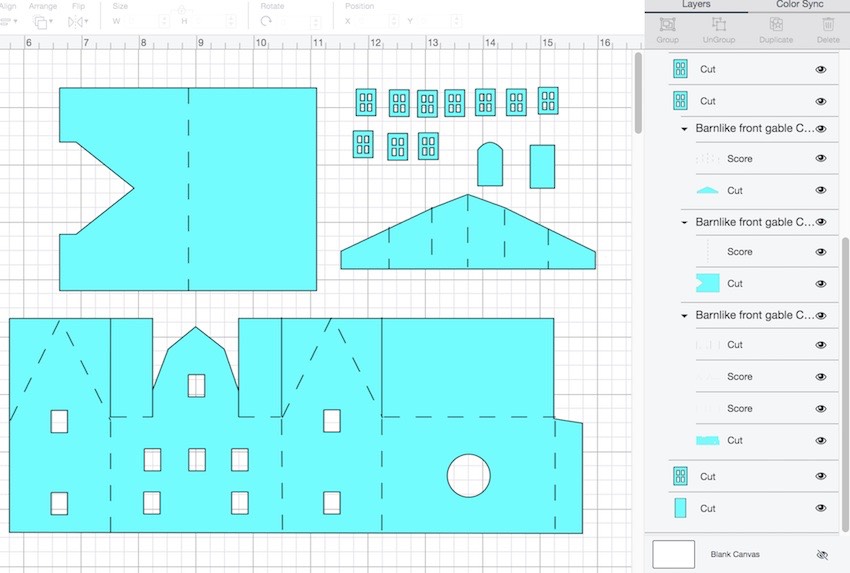
Next cut out the pattern by hand or using an automatic cutting machine. For most of my houses, I use the Cricut Explore Air or my Cricut Maker and the Design Space software online. Below you can see how the file looks in Design Space. And I'll mark the score lines. Since the pattern fits on one 8.5" x 11" page (because it is a small house), there are a fair number of lines to convert to score lines - the house score lines, the front gable, and roof piece. Be sure to attach.
Here's how it looks when you first upload the file to Design Space.
And here is how it looks when all the score lines are marked and attached.
Prime and paint the little house, the door and windows
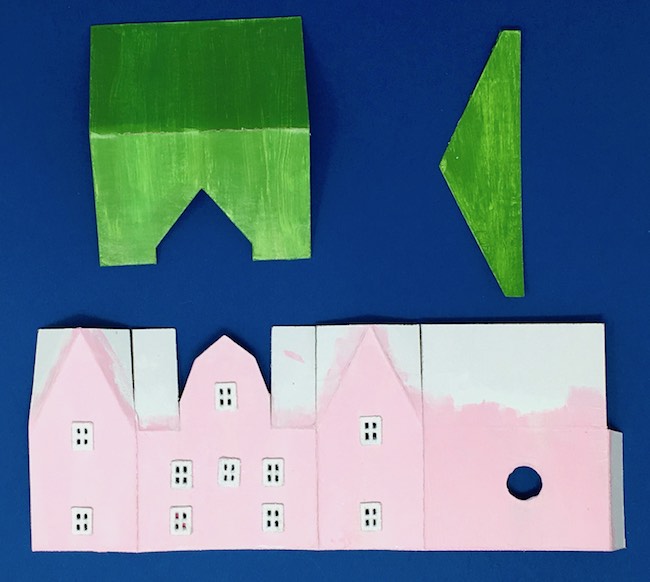
Generally, I prime and paint my little house at this stage. You don't have to do it in this order, but I find it easier to paint while the piece is still flat. It does leave you with some touch up especially at the corners, but I still think it is easier to do it that way.
Glitter windows, if desired
For this little house, I decided to glitter the windows because they are so tiny. I figure they have a bigger impact if they are glittered. To do that, paint the windows white or just use primer, let dry. Then paint them with Mod Podge and sprinkle on glitter.
Glue the door and windows to the house
And then I also like to glue the door and windows to the house before it is assembled. Again, I seem to be able to glue then on straighter when I do it as this step. You can do it later if you want.
Glue the house together
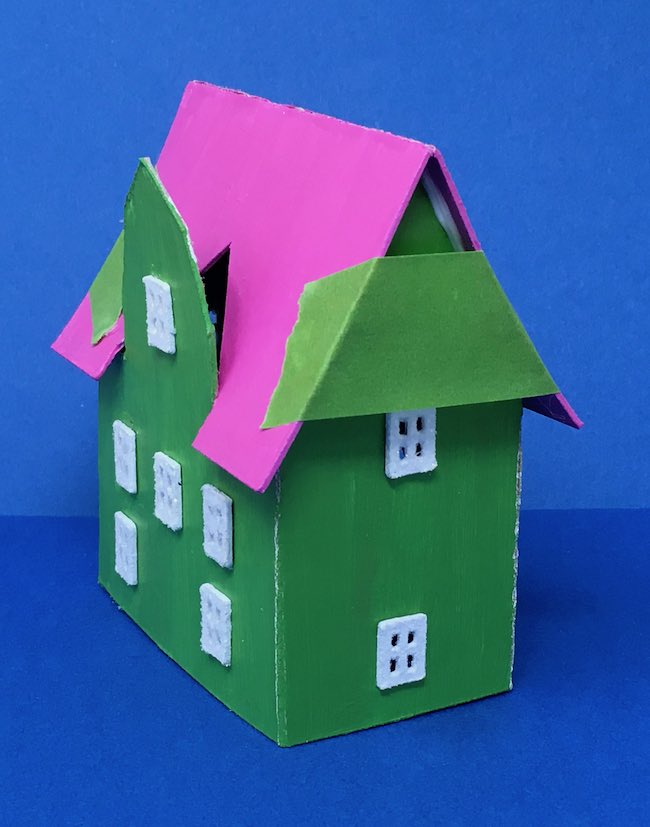
After all the paint and the door and windows are on, then I glue the house together along the glue tab on the side. Let that dry. Then glue the roof tabs ON TOP OF the roof flaps. This helps maintain the structure of the house.
Next fit the roof on the house and glue
I was so happy when the pattern I drew fit so perfectly the first time. That's an unusual occurrence. Usually I have tweak it before the roof with the gable cutout fits.

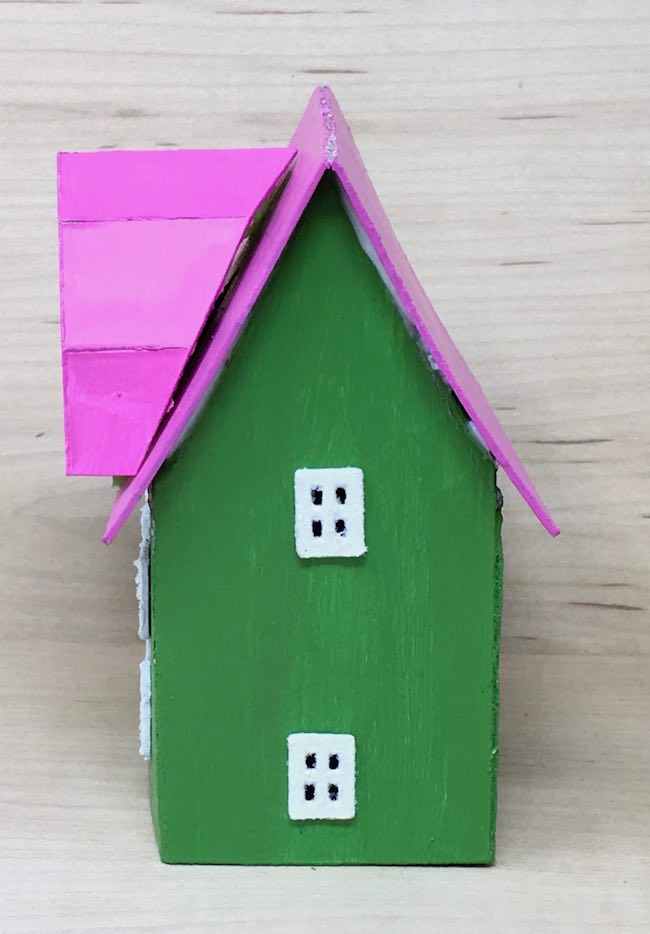
To glue the roof on, apply a thick bead of glue to the edge of each gable end and along the front and back flaps at the fold line. Needless to say, do not apply glue to the front of gable.
When the roof is situate properly, either hold the roof in place while the glue dries OR use painter's tape. My favorite is the green frog tape. It rarely pulls up the finished surface. I listed it in the materials for this house because it is so helpful in gluing the front gable roof on in the next step.
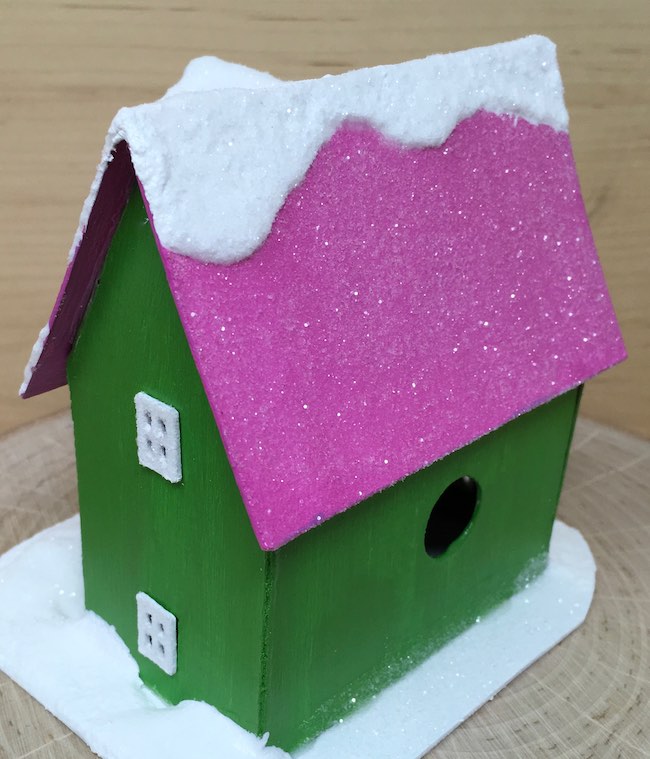
Adhere the gable roof to your mini paper Christmas house
Here's the only thing tricky about this house - gluing the front gable roof on. That's because it has several angles - the one at the peak and the 2 on each side.
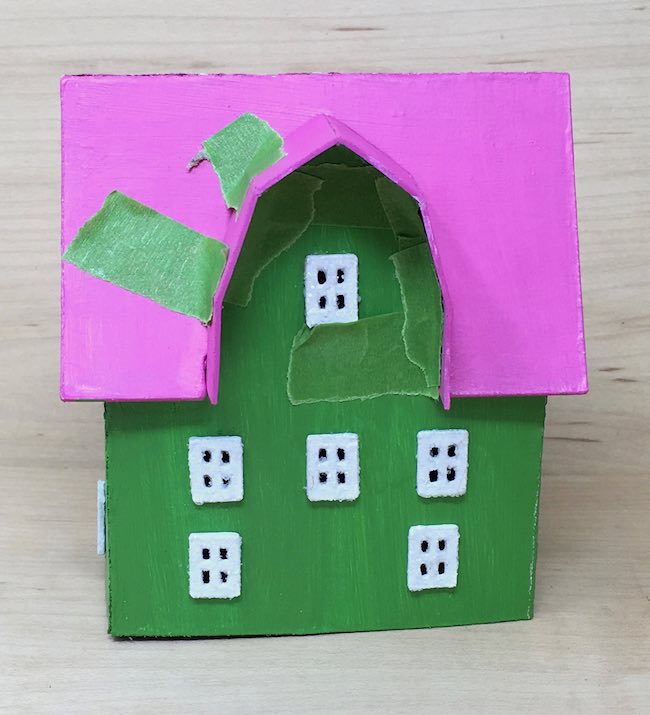
I even had to tweak the pattern to make sure the gable roof matched the roofline. See below. Don't worry, I changed it on the uploaded patterns.
So to adhere the gable roof, apply a thick bead of glue on the angled back of the roof. Next apply a bead of glue along the barn-like shaped gable front. Try to lean it backwards so the glue will drip behind the gable and won't be visible when you place the roof. If you wait a few minutes (like 2-3 minutes) the glue gets a little more tacky and holds so much better. This is where I think Aleene's Quick Dry Tacky Glue does a truly superior job in holding faster.
Make the base
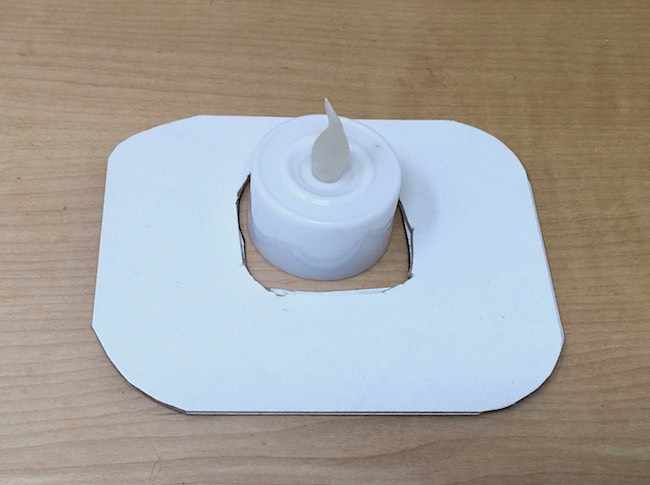
Partly because I am in a hurry and partly because this is a little house, I cut out 2 pieces of cardboard about 4" wide and 3.5 inches deep, glued them together. Then cut out a hole just over 1.5 inches in diameter so you can fit an LED votive tea light in the house. Again for simplicities sake, I just painted it white.
Apply snow
You can add snow before or after gluing the house to the base, but whatever you choose make sure the snow is dry before you start handling the house. I learned that the hard way. And re-snowing your little house is hard to do.
My technique for applying snow is to mix the Snow-Tex with white gesso to make it creamier. Then I load up my brush and kind of push the snow into place. Sometimes it is thin enough that it flows a little bit and makes a smooth surface like newly fallen snow. I love it when it does that. But I can't always get the texture right every time.
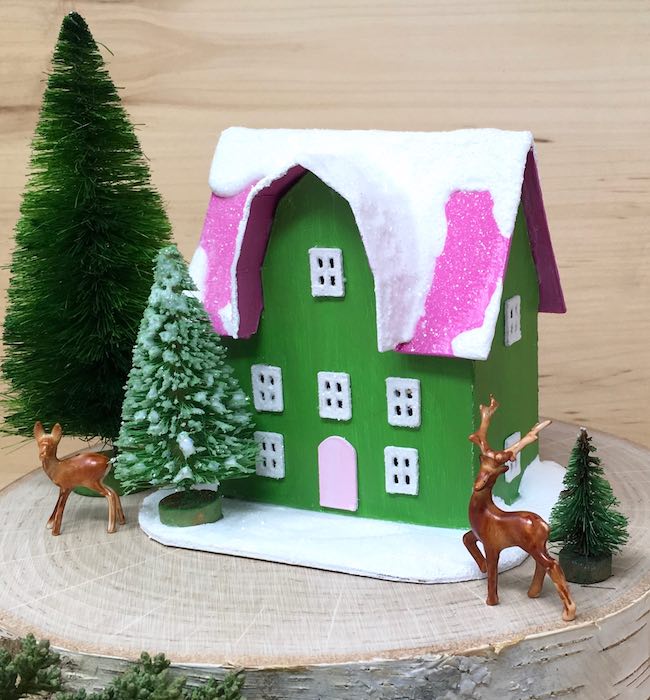
Glue the house to the base and add embellishments
Finally, apply a thick bead of glue to the base of the house and glue it to the cardboard base. Hold it in place for just a little while. Then allow to dry. Once the glue is dry, I apply snow to the base and glue my embellishments in place. For this house I just glued a little tree in place.
And last, I painted the roof, the tree, and all the snow with Mod Podge and then sprinkled glitter on top.
I really like the effect. I hope you do too.
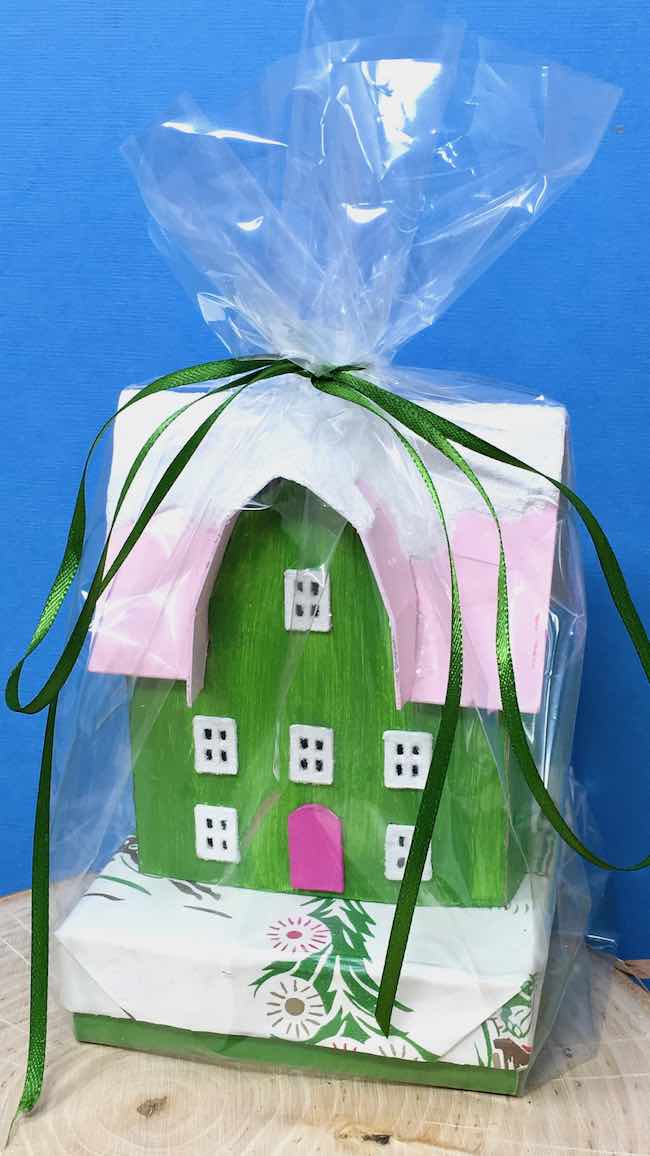
Now show off your adorable little Christmas house. People will love it. The little paper house also makes a great gift.
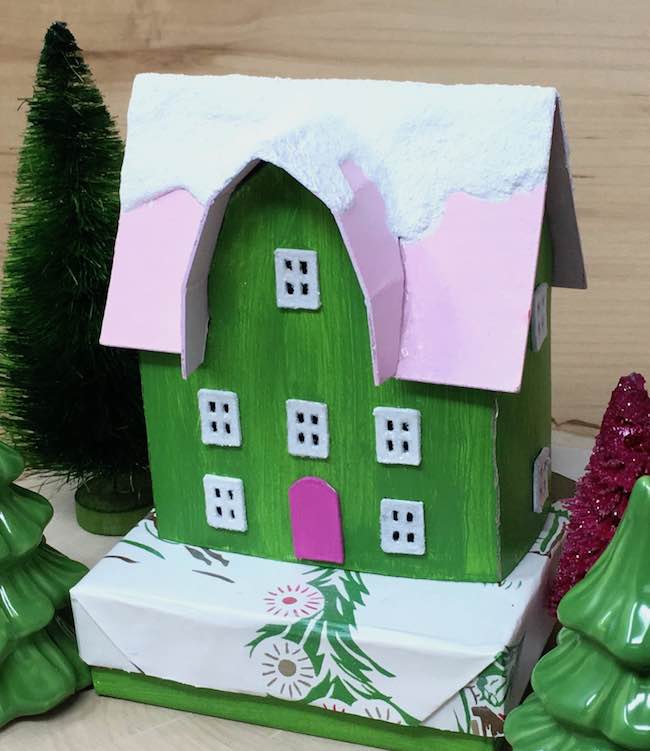
Here's how I glued it to the top of a little gift box for a friend of mine.
Lucy
P.S. Feel free to pin any of the photos to your favorite Pinterest boards. Then you can remember where you found the pattern and tutorial.
Iris
Love this. Thanks for the great projects.