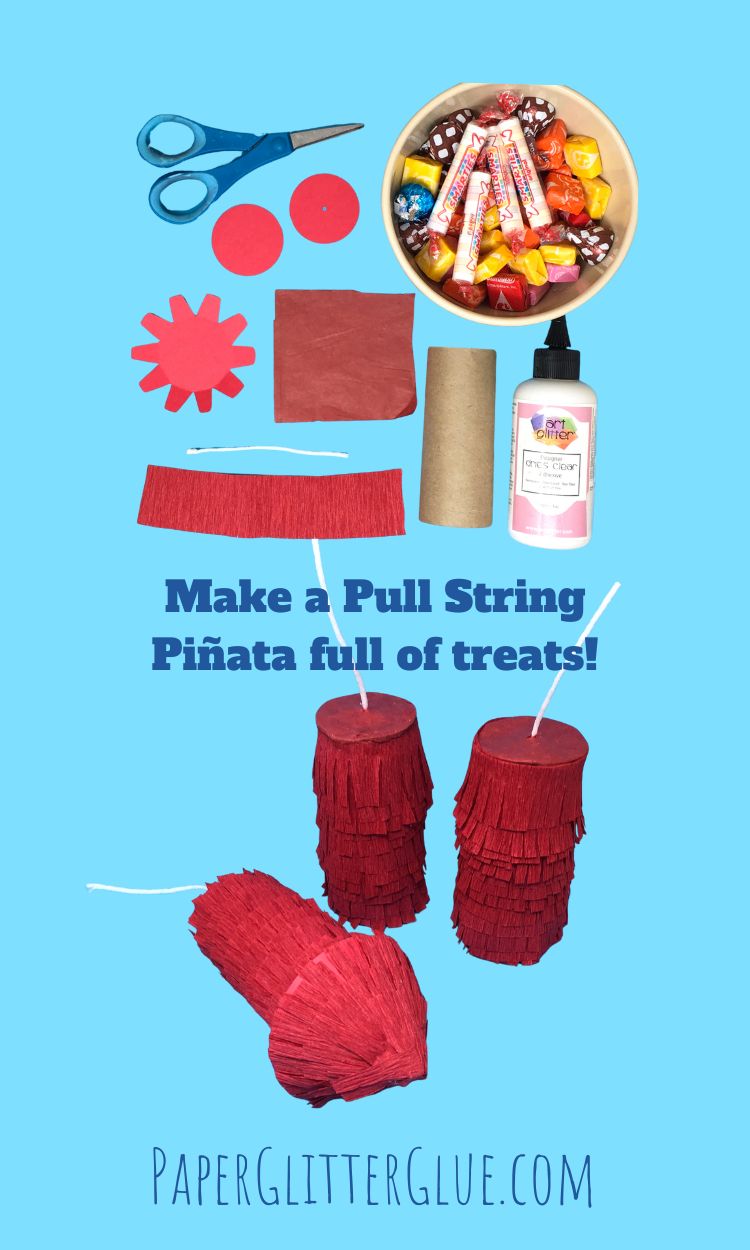
What is a pull string piñata?
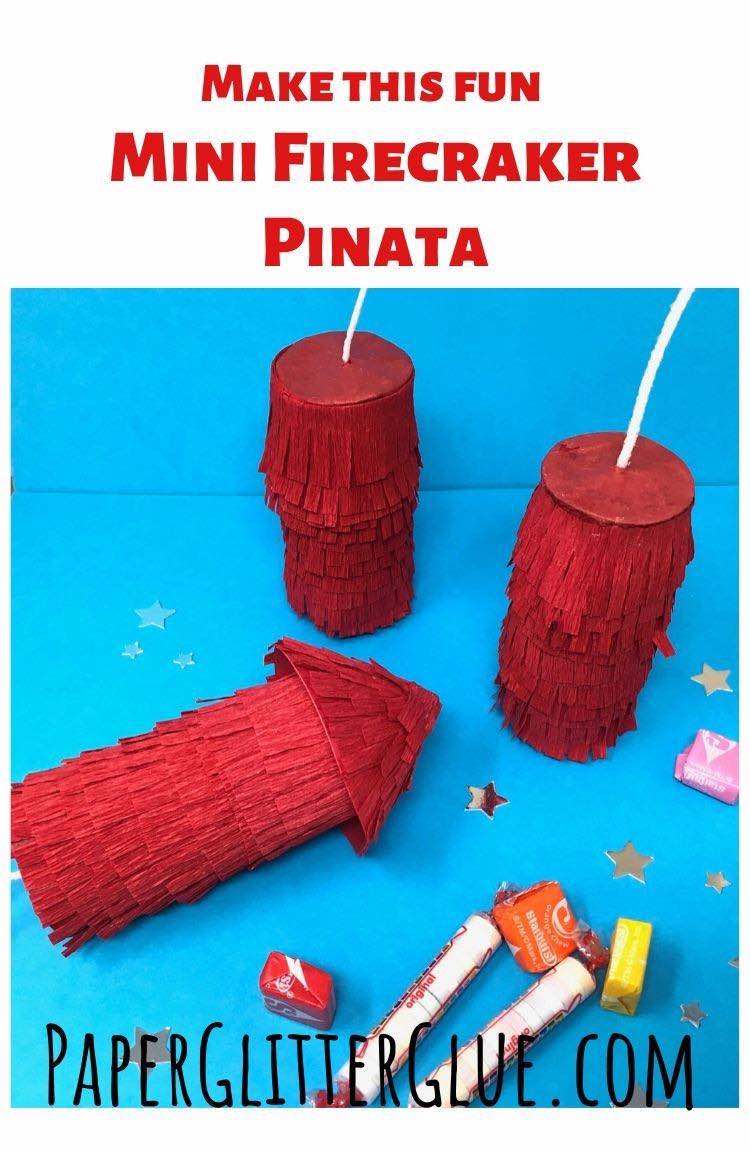
Well, it is a piñata that you don't have to whack to open it. You just pull the string. It's a fun variation on the traditional piñata. And what else makes this piñata special? It's a personal treat box - a little firecracker - that you don't have to share with anyone else.
This paper craft would be great at a New Year's Party, for the Fourth of July or at any other celebration.
So here's how you make this fun little piñata.
This post contains some affiliate links for your convenience. Click here to read my full disclosure policy.
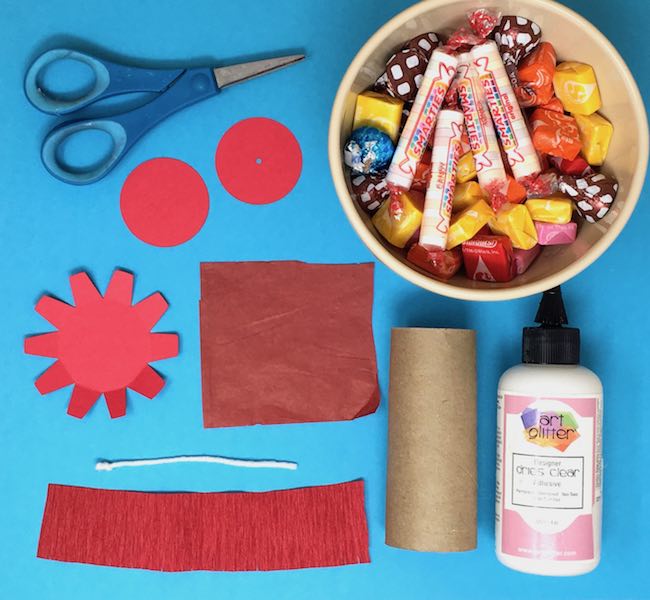
Materials to make the Firecracker Pull String Pinata:
- Pattern for the Pull String Piñata - Design No. 72 - from the Paper Glitter Glue library
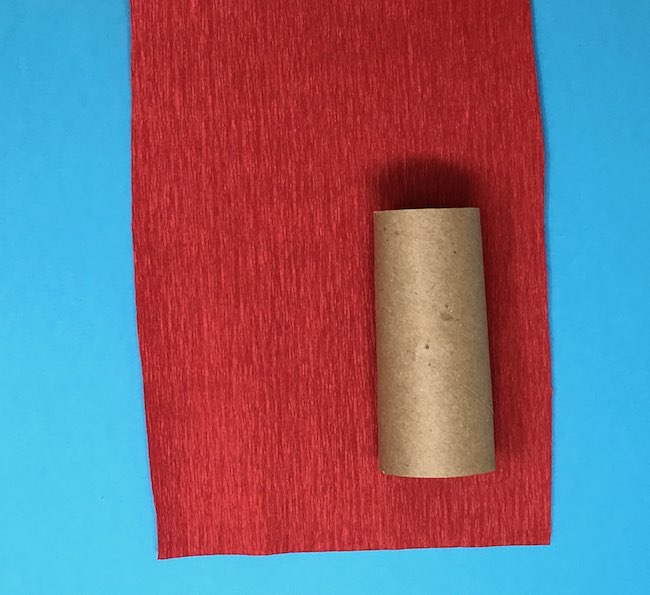
- Toilet paper rolls or craft rolls cardboard tubes
- Card stock
- Tissue paper
- Crepe paper - can use streamers, but I prefer this thicker sheet crepe paper
- Glue - plain old white PVA glue works
- Yarn - inexpensive acrylic yarn
- Candy
Outline for making the Firecracker Piñata:
- Copy the pattern for the firecracker piñata - Design No. 72
- Cut out the individual pattern pieces
- Glue the card stock bottom to the cardboard tube
- Insert candy
- Make the "fuse" (the pull string) for the firecracker
- Secure the fuse within 2 card stock circles
- Cover the yarn fuse and circles with tissue paper
- Adhere the tissue paper to the cardboard tube
- Make crepe paper fringe
- Starting at the bottom of the cardboard tube glue on crepe paper fringe
- Work your way to the top of the cardboard tube towards the pull string to cover the entire firecracker
How to make the Rocket Pull String Piñata variation:
- Roll the semi-circle into a cone and glue
- Make the piñata with a card stock end piece
- Insert candy
- Make the pull string end of the piñata to enclose the candy
- Start attaching crepe paper fringe at the pull string end
- Completely cover the cardboard tube ending at the card stock end piece
- Let dry
- Cover cone with crepe paper fringe
- When dry, glue the cone to the card stock end
And here are more detailed instructions on making the Firecracker Pull String Piñata.
First copy the pattern for the firecracker piñata
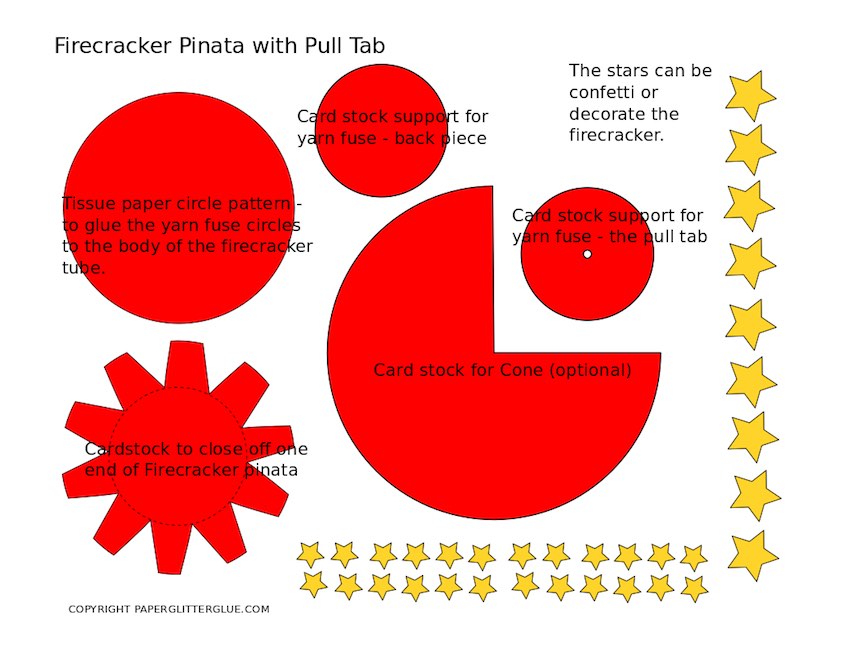
I wrote up an SVG pattern for this craft - Design No. 72 in the Paper Glitter Glue library, but it's pretty simple without it. Here's a photo that shows you all the pieces on the pattern to make the pull string or pull tab piñata:
- 2 small circles to hold the pull string in place
- Slightly larger circle made out of tissue paper to cover the pull string and adhere it to the cardboard tube
- Circle with tabs to close off one end of the cardboard tube
- A semi-circle to make a cone if you would like to make a rocket-shaped pinata
- Stars to use as confetti within your piñata or to decorate the outside
As always, you can get the free pattern - Design no. 72 - from my Paper Glitter Glue library. If you have the password, just go to the library like you usually do. If you don't have password, just subscribe to my newsletter and I will send you the password to the library right away and in every newsletter as well. You can subscribe with the form below.
Cut out the individual pattern pieces
Next cut out the individual pattern pieces. The only thing that is made out of tissue paper is the circle that covers the pull string. All the other pieces in the pattern are cut from card stock.
Also the only score lines needed are on the tabbed circle piece.
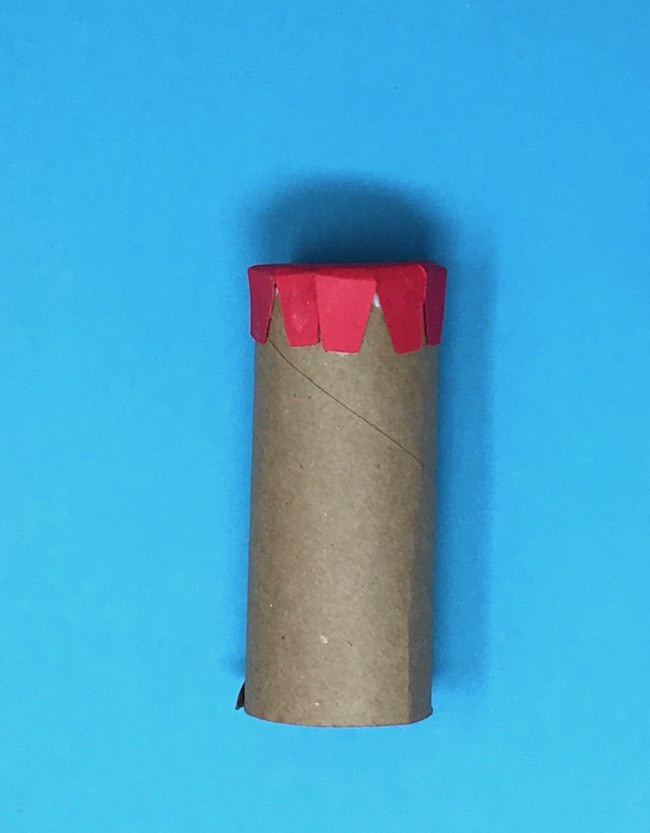
Glue the card stock bottom to the cardboard tube
Use the tabbed circle to make the bottom of the firecracker. Just fold the tabs around your cardboard tube and glue in place. You can use tape if you want.
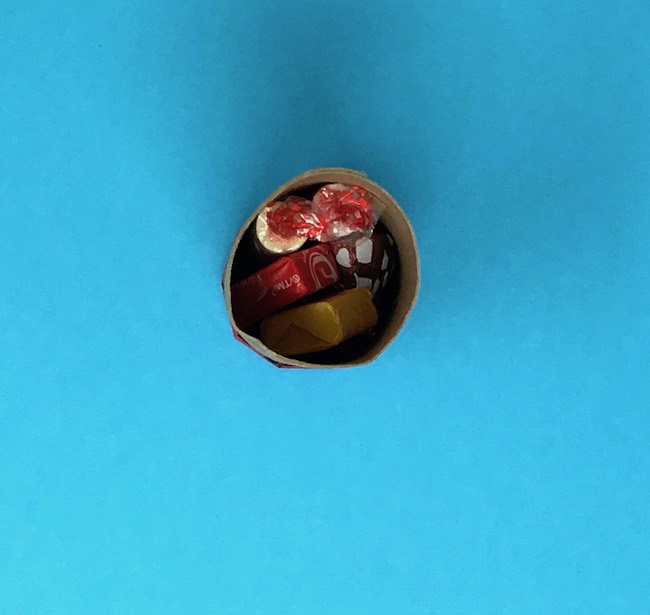
Insert candy or little gifts
And here is an important step - remember to insert the candy before you close off each end of the firecracker. I like to use Smarties as the candy inside because they fit the tube so well. And I have loved Smarties ever since I was a child.
Make the "fuse" (the pull string) for the firecracker
Now make the pull string. You can use regular twine, yard, ribbon, whatever you want. But I wanted the "fuse" of my firecracker to stand up so I coated some white acrylic yarn with a thick layer of glue and let that dry. Tie a big knot at one end of the yarn to prevent it from pulling through the card stock circle.
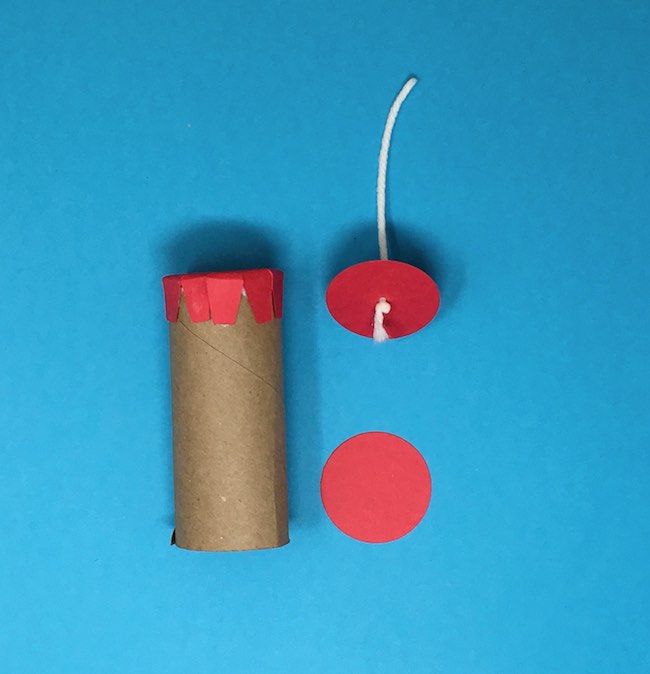
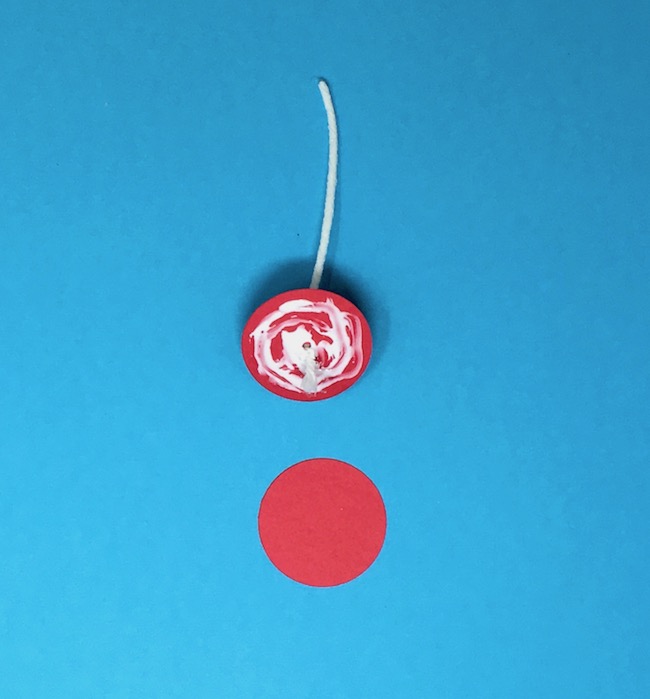
Secure the "fuse" within 2 card stock circles
Thread the yarn through the hole in one of the card stock circles. Then glue the two circles together. This firmly anchors the yarn in place.
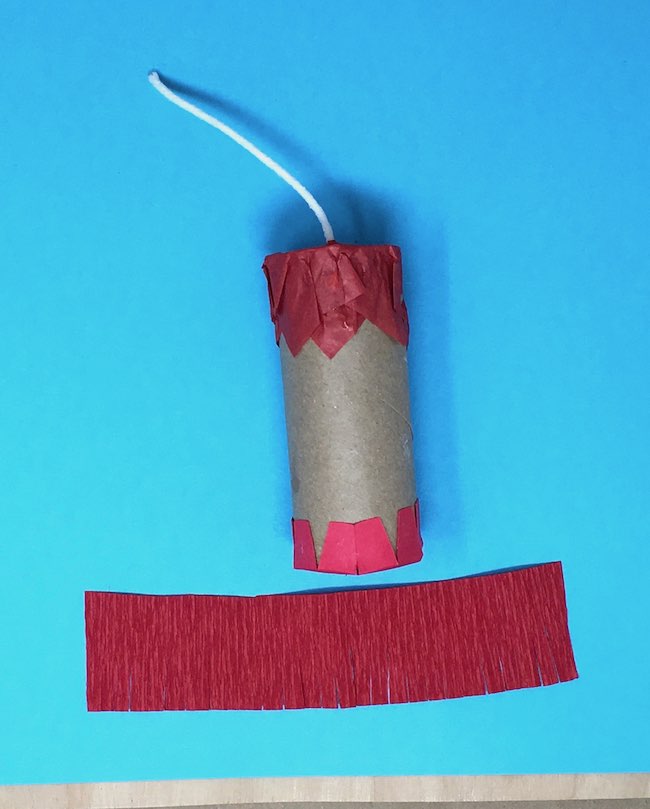
Here's what it looks like when you glue the bottom circle in place.
Cover the yarn pull string and circles with tissue paper
Now poke a small hole in the tissue paper circle and thread the yarn through that. Apply some glue to the top of the card stock circle and stick the tissue paper in place.
Adhere the tissue paper to the cardboard tube
Next apply some glue - not a lot - to the cardboard tube and adhere the tissue paper to the top of the tube. Let that dry before you start adding fringe. This is what will tear when you pull the string to get to the candy.
Make decorative fringe
Now make the crepe paper fringe to decorate the piñata. From the sheet of crepe paper cut out a strip about 6 inches wide because that will completely go around the cardboard tube. Then fold it in half and cut multiple strips about 1 inch wide. Now cut the fringe on these individual strips.

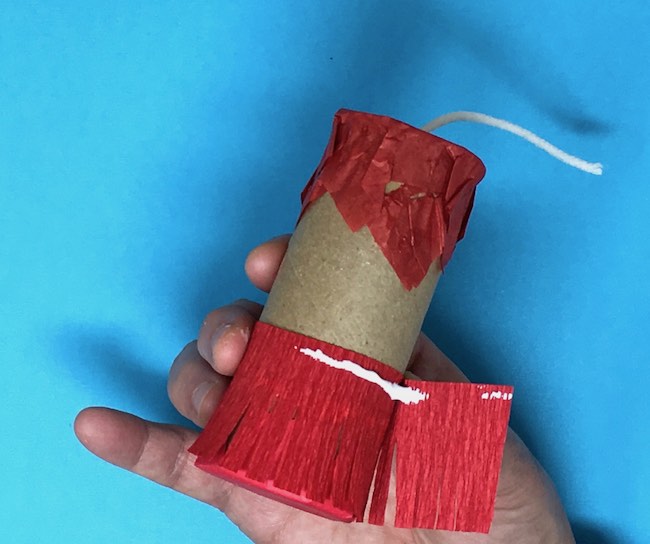
Starting at the bottom of the cardboard tube glue on crepe paper fringe
Start gluing the crepe paper fringe at the bottom of the firecracker (not the fuse end). You don't have to use much glue to get it to adhere.
Work your way to the top of the cardboard tube towards the pull string to cover the entire firecracker
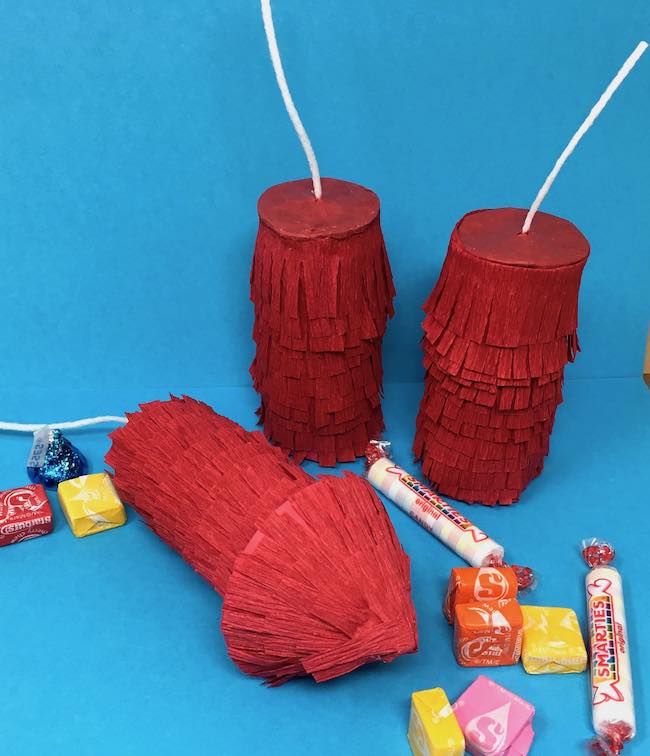
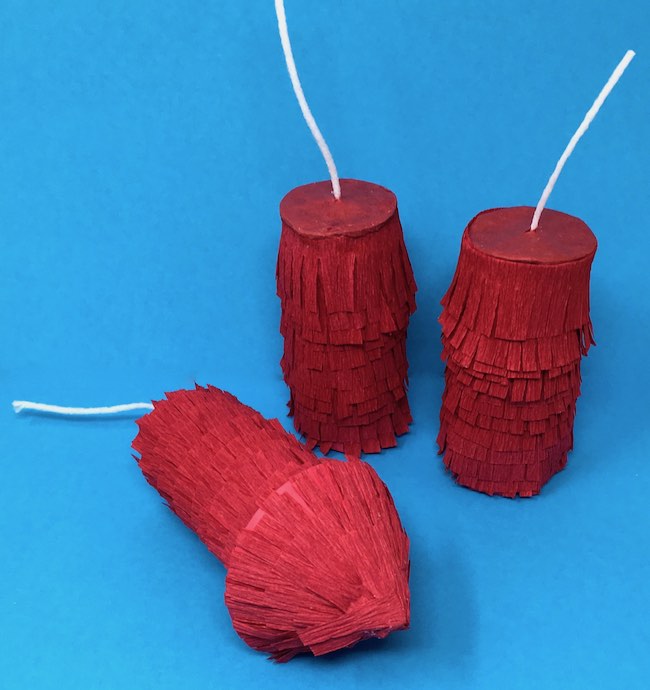
Finally, keep adding successive strips until you cover the entire cardboard tube. And your little pull string piñata is done.
Rocket-Shaped Firecracker Piñata Variation
To make the Rocket-shaped piñata there is really only one major difference. And that is the fuse, the pull string, is on the bottom so that is where you start adding your crepe paper strips.
Because of the shape of the cone, it's easiest to apply the crepe paper before you glue it to the top of the cardboard tube. So once that is done, glue the cone to the cardboard roll on the opposite end from the pull string.
This is no. 13 in the 15 Days of Holiday Crafts. Yes, slowly I am getting through them. I hope to have a pretty cardinal ornament done in the next day or so.
Here are the links to all the other projects in this Holiday Paper Craft series:
- Red Roof Holiday Cottage
- Merry ChrisMoose Gift Box – DIY Mini Holiday Piñata
- Mini Paper Christmas House with Barn Shaped Gable (the Green Gable house)
- Gingerbread Paper House – made with Gingerbread Paint
- DIY Gnome Gift Box
- Scotty Dog Gift Box
- DIY Paper Wallet for Holiday Gift-Giving
- Paper Gingerbread Ornaments – Scented Gingerbread Men
- Happy Hollydeer Piñata Candy Box
- How to Make a Paper House Ornament for the Holidays
- Easy Gingerbread House Paper Ornament
- DIY Display Gift Box for the Paper House Ornament
- Pull String Piñata - Miniature Firecracker Piñata
- DIY Bird Ornaments - Cardinal, Goldfinch, and Bluebird (counts as 2 projects)
Questions?
And if you have any questions, please let me know. You can email me at [email protected]. Also if you have any projects you would like to see I would love to hear your ideas.
Thank you for reading.
Lucy

Evelyn Mitchell
Thank you for this idea. I have a grand daughter who can not stand the bangs at Christmas time when we have the traditional Christmas crackers. Puts a bit of a dampener on the festivities when she starts howling. So I am going to try this idea instead of crackers. Hopefully everyone can have fun with the contents and with no tears. Ah we all have something that scares us.
Lucy
That really makes me happy to hear this. It's fun and easy. Let me know how it works.
Lucy
Helen Roberts
These are so cute! Thank you, Lucy, for another wonderful share.